They say you learn a lot about yourself in isolation. I’ve decided to take it a bit of a different direction.
Hey, hi, and hello. Yesterday I decided that I would cook my way through my heritage and today I decided that I would make a blog about it! Honestly, I’m okay with nobody but myself ever reading this, but if you’re here and you’re someone other than me, WELCOME and thanks for coming. Anyway, I have ordered a DNA testing kit from ancestry.com, so I will be spitting in a tube very soon and then awaiting my results. In the meantime, ancestry.com offers a free 14-day trial of their database and family tree builder, so naturally I spent all day (literally) learning all about myself and my family.
I started by going back as far as I needed to on my family tree to find the first family member born in a country other than the United States and took that as a country of origin for that side of my family. Here’s what I found out so far (no DNA results yet, though):
On my mother’s side, the countries of origin were: Hungary, Slovenia, Poland On my father’s side: Germany and Ireland
Until I get my DNA test kit back, these are the countries that I will be starting with! Let’s get this party started! If you’d like to learn some tasty dishes that you might not have known existed, then stick around 🙂
Hello and long time no see! Things got a little busy after moving across the country and setting up a new house, but I’m back! This post won’t be too long, I just wanted to share my official ancestry results and a little bit of the “traits” results which I opted into, so here we go!
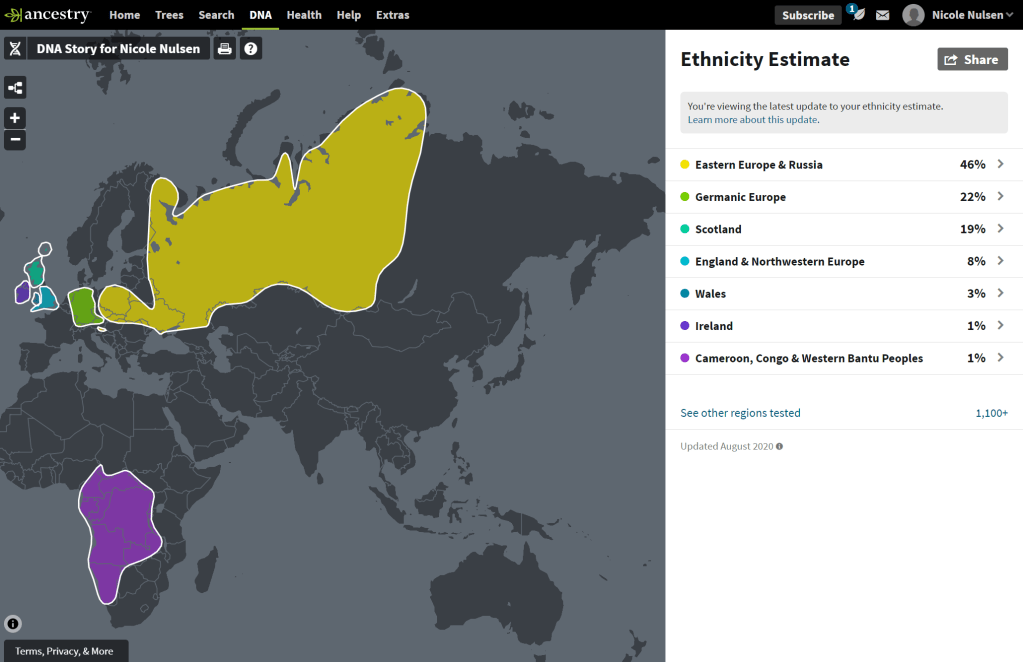
Screenshot of my general ancestry results
These results are about what I expected, Eastern Europe and Russia from my maternal side and Germanic Europe, Scotland, and England & Northwestern Europe from my paternal side. Let’s get into some of the regions in more detail; just for fun.
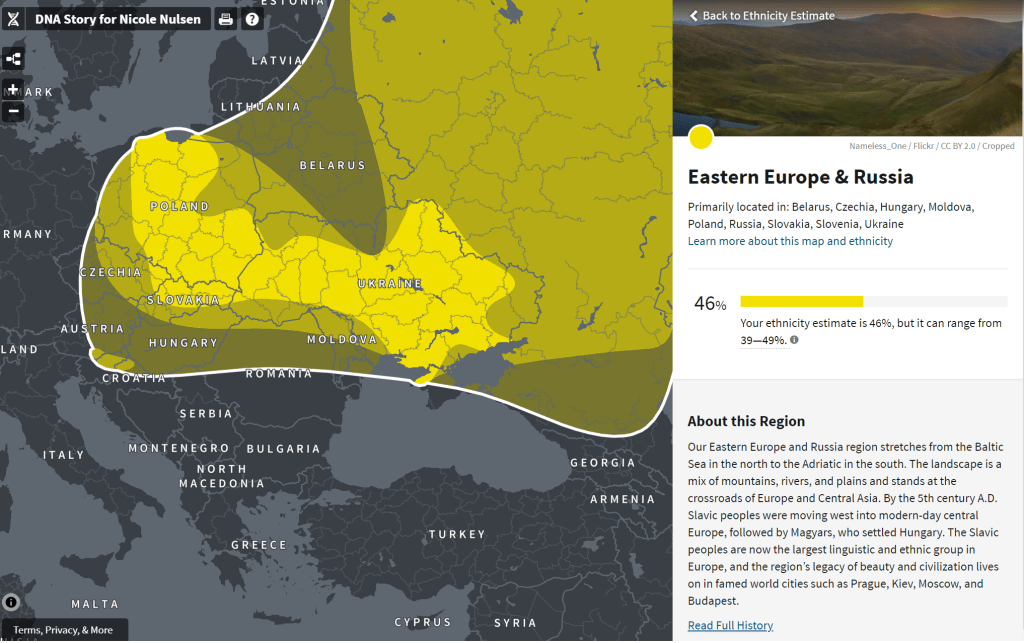
Eastern Europe & Russia
This region did surprise me a little bit, as it said my ancestors are most likely from Poland, Ukraine, and Slovakia. I traced back ancestors from my maternal grandfather to Hungary, but I believe, if I would have investigated further, that I would have seen an immigration from Ukraine at some point in the early 1900’s or late 1800’s.
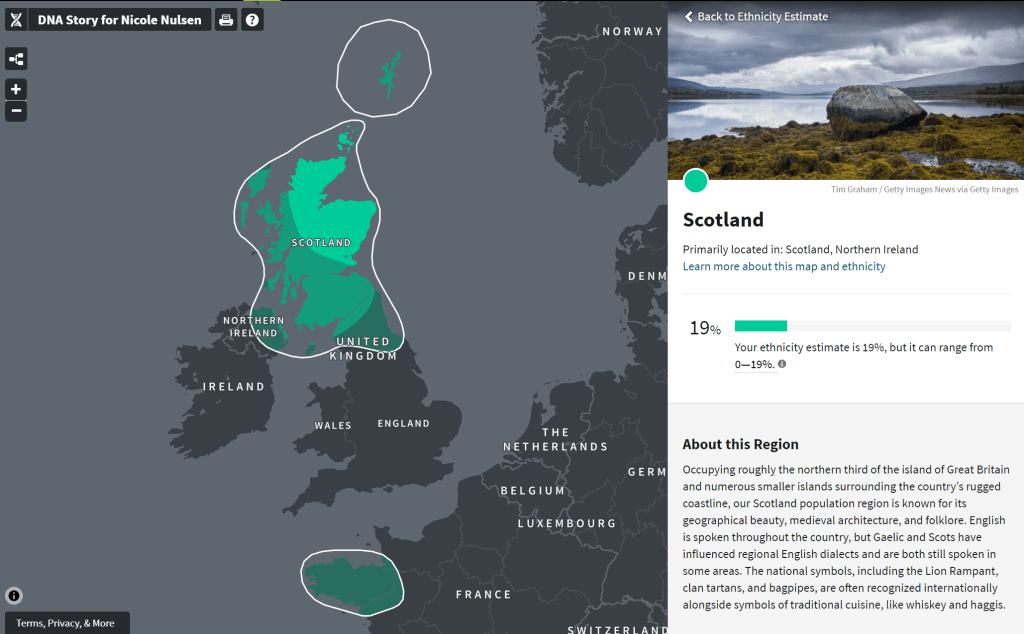
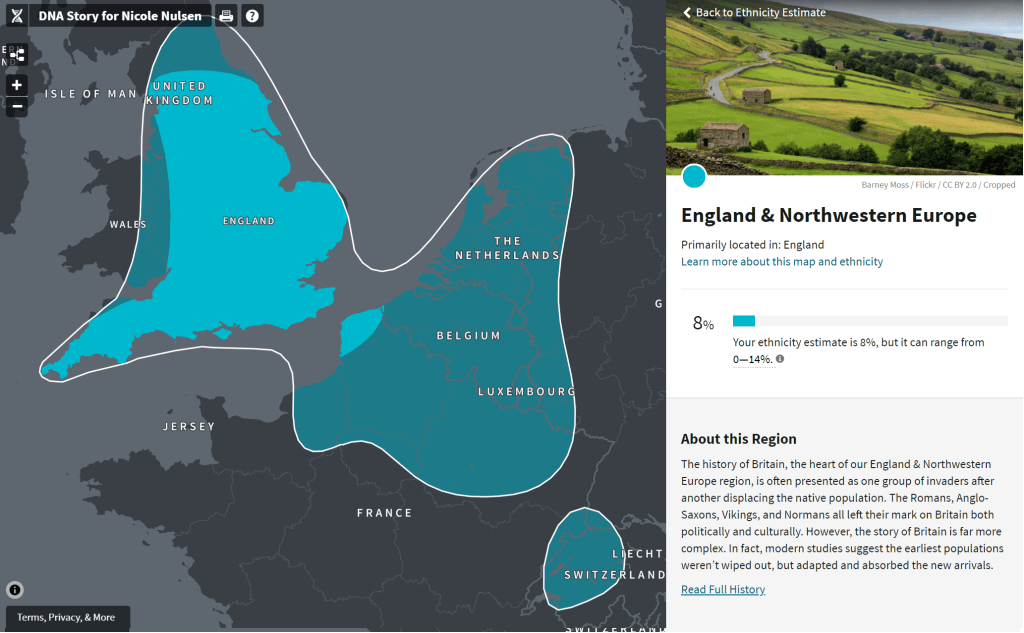
Scotland & England
Scotland and England were both a surprise to me. I guessed that I had ancestors from Ireland based on my paternal grandmother’s maiden name, “Sullivan.” Although, I discovered it may be difficult to pinpoint ancestry based off of my grandmother’s ancestry after I was able to trace some family members back to early american colonies (1700’s). So, even though the Sullivan side can be traced back to Cork, Ireland, there have been a lot of marriages to women with varying ancestries since the 1700’s. My paternal great-grandmother had a last name of “Still,” which has Scottish and English origins, so that is where I suspect them to come from.
Traits
This was a fun extra part of the ancestry results that you can opt into and I REALLY wanted to know if I was doomed to having red-headed children since my mom, my husband’s mom, and my paternal grandmother all have/had red hair.
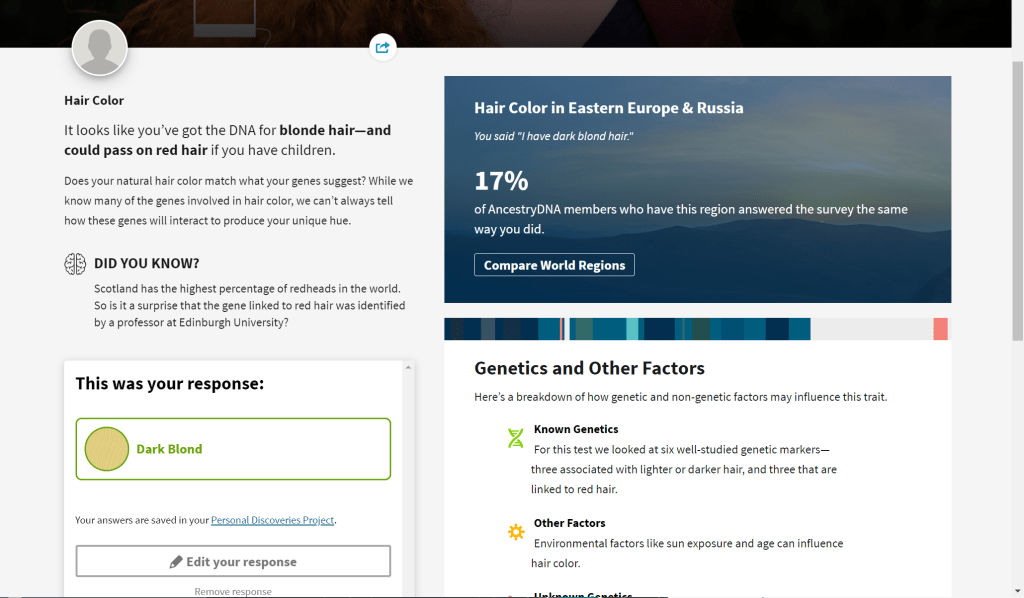
Hair Color
Turns out I might have red-headed children, especially since my husband probably also has the same gene, spooky. Although, I do already have a red-headed child named Lucie and she’s pretty cute.
Also, it’s seemingly uncommon for people of largely Eastern European ancestry to have blonde hair, neat.
My red-headed baby
SWEET SENSITIVITY& SAVORY SENSITIVITY
I was curious what this one would say since I do tend to scrape the icing off of my cakes and am not typically drawn to things that are too sweet, but I also like to salt almost anything.
Not a surprise that it was confirmed I am more sensitive to sweet flavors and less sensitive to savory flavors. I took all of these results with a grain of salt (haha) because not all genetic markers are well tested or known, but it was still fun to see what they had to say about my DNA relating to some of my traits.
This post is in no way sponsored or affiliated with ancestry.com. I wish I could get a sponsorship LOL.
Slovenia is a country that I low-key had barely even heard of. When I discovered that my Papa was part Slovenian I was very excited to learn a little more about it (and their food). As I said in my previous post where I made Hiddeg Meggyleves, my Papa was the most quiet guy I’ve ever met. I didn’t know a thing about him other than the fact that he gave great hugs and was always giving me ice cream.
My Papa who passed in 2012 and my cat Jade who is still alive!
Slovenia seemed to share a lot of similar dishes with Hungary and other surrounding countries since it is historically a crossroads. I thought there was no way I’d learn anything surprising about my heritage, but here we are! I definitely thought I was just a boring white girl, but I think my heritage is actually pretty cool. I mean, I could still be a boring white girl depending on who you ask.
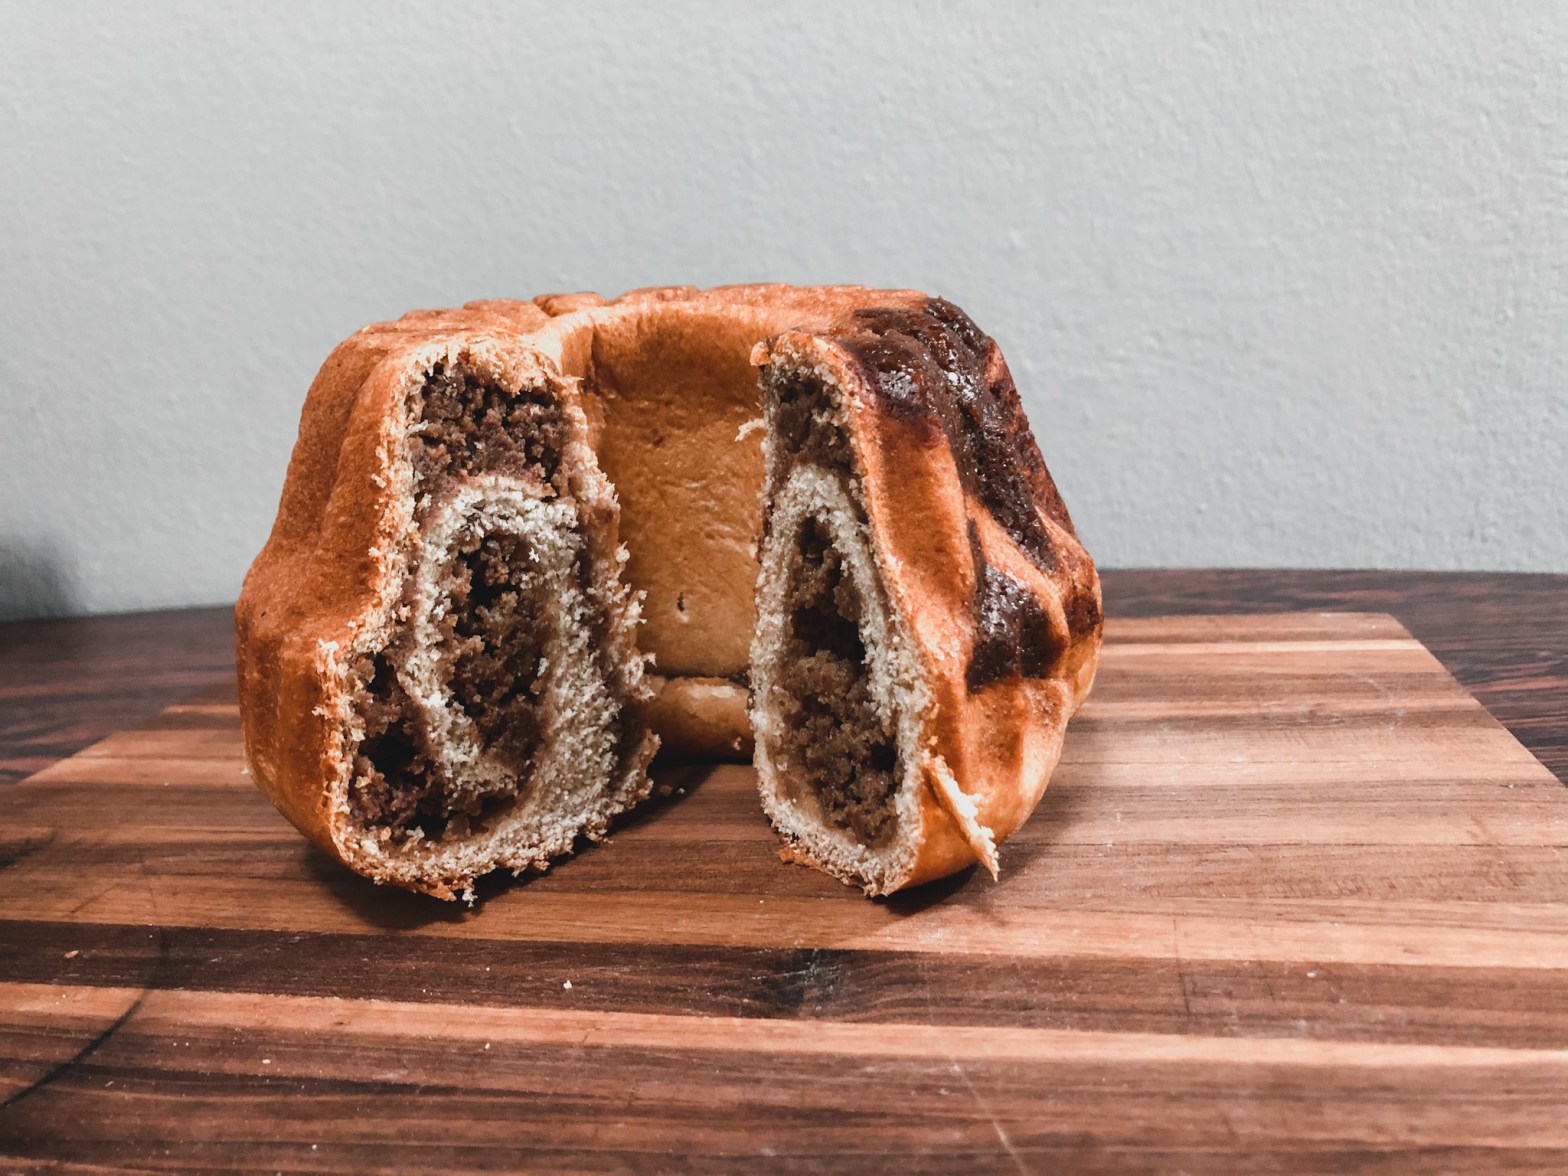
Potica (Poh-TEET-sah), or Slovenian nut-roll, is a dish/cake traditionally baked for special occasions like Christmas, Easter, birthdays, and weddings. It’s a light brioche dough filled with a rich tasty filling according to Jernej Kitchen. It is traditionally made with nut filling, but other popular ones are poppyseed, cottage cheese, hazelnut, chocolate, tarragon, leek, honey, and carob fillings. Let me tell you, this bad boy was very tasty and made my whole apartment smell amazing. Now let’s get into baking it!
Baking! (or trying to)
I have a confession, this is the second time I’ve baked. Ever. Unless you count box brownies, and I’m not even great at making those. The first time was actually for a bake-off at my engineering internship last summer where I baked a s’mores cheesecake and won a $25 amazon gift card, so I’m basically a professional now. Speaking of being a professional, I finally upgraded and bought a hand mixer, a rolling pin, and a flour sifter!
The recipe that I used was from the Slovene National Benefit Society. I had to cut the recipe in half, though, since it made five 9″ x 5″ loaves. That’s a bit much for just me and my fiance! I also had to sub instant yeast for cake yeast because we’re in a pandemic and everyone had decided to take up baking as a hobby (the store are all out of yeast).
Now, step 1! You need to mix your yeast and let it rise. Stir it with warm milk and sugar until the sugar dissolves. This is where I subbed in instant yeast. I found online that you can sub 2 1/4 tsp of instant yeast for every ounce of cake yeast, so that is what I did. You’re also supposed to let your yeast rise for ~10 minutes, but during this time I discovered that I was out of sugar for the rest of the recipe and had to go to the store real quick to get more. I’d say my yeast sat for at least 20-30 minutes and I don’t know if that matters because I don’t know anything about baking!
My yeast, sugar, and milk after rising for 20-30 minutes
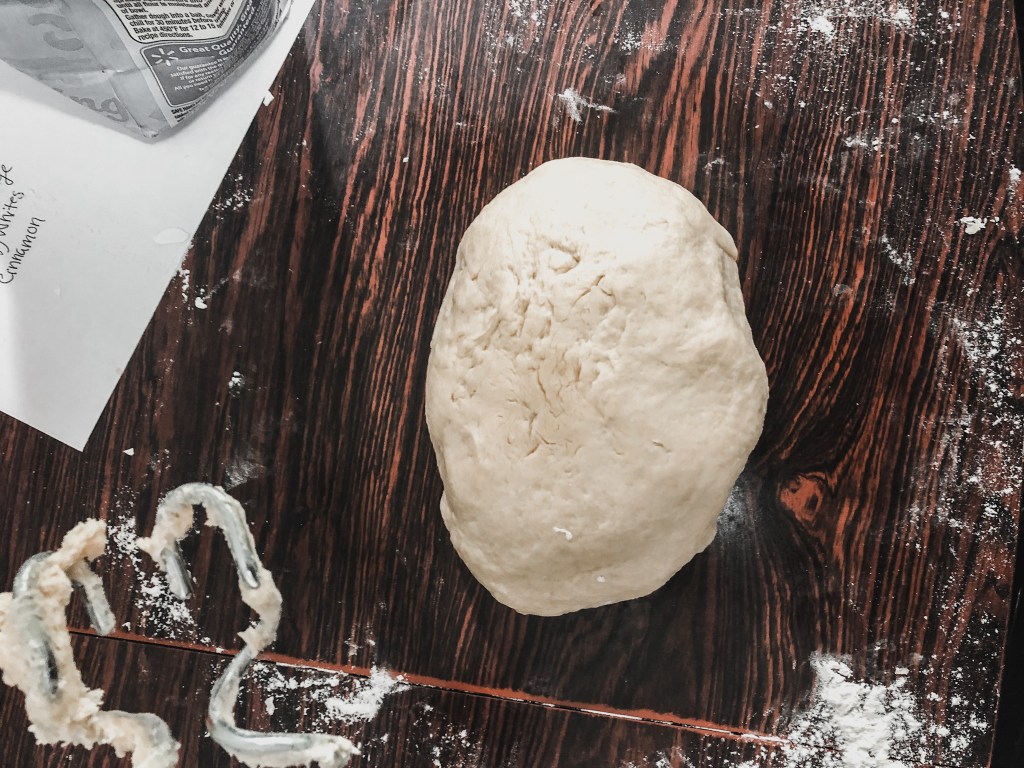
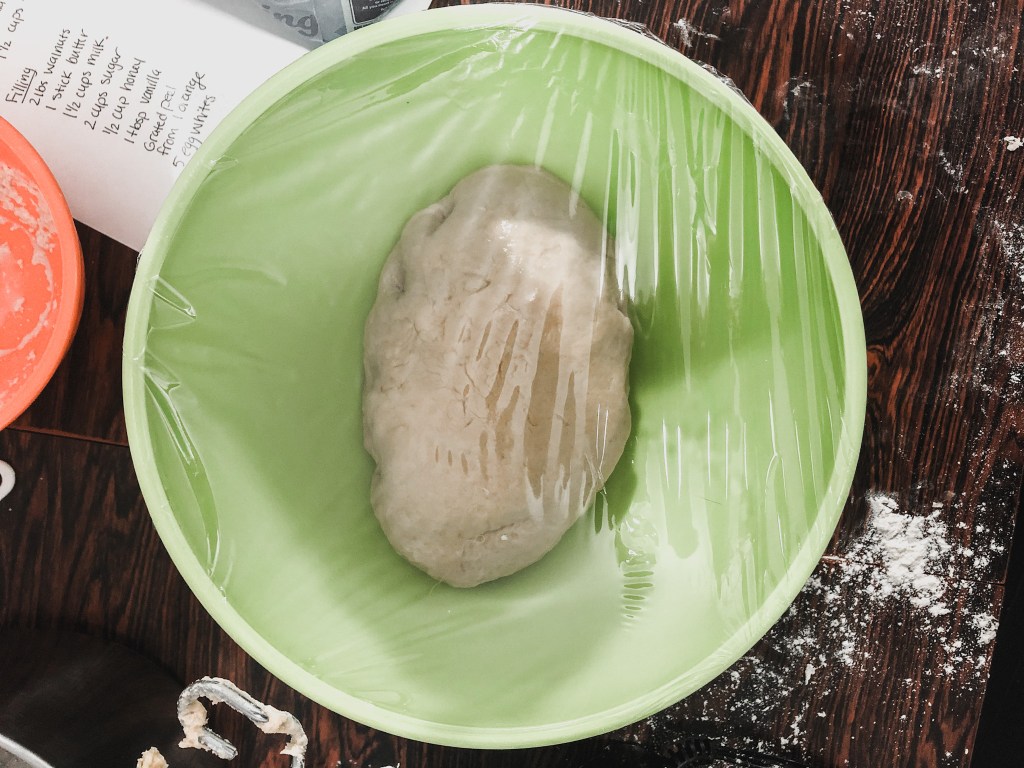
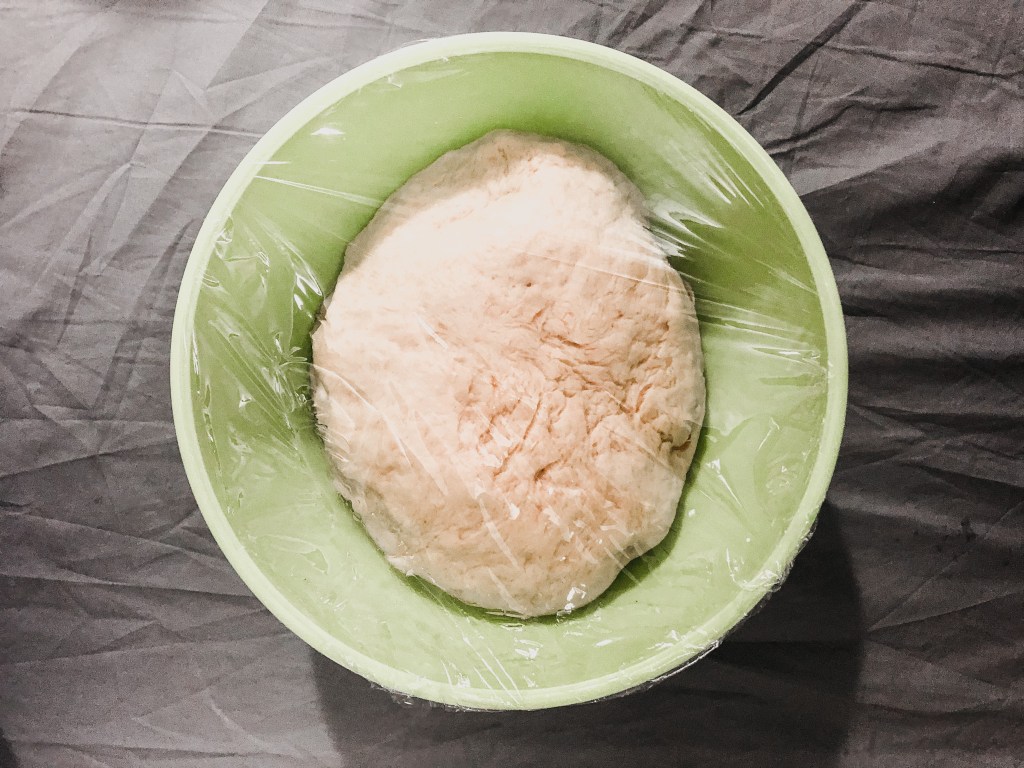
Next up is making the dough. I first had to “scald” milk in a pot. Cut to me googling how to scald milk; I still don’t exactly know, but you heat it until little bubbles and steam come from just around the edges. Then add butter, let it melt, then set aside to cool. In a separate bowl, beat egg yolks, salt, sugar, and vanilla until “lemon colored.” Finally, sift 1-2 cups (for 1/2 recipe) into a bowl and combine everything; milk mixture, egg yolk mixture, and yeast. Beat it all with your electric mixer and just keep adding flour until the dough can be handled without sticking. You can use a wooden spoon to mix in the flour after the dough gets too thick for the mixer, or if your mixer has little bread hooks like mine, you can use that! I was a little quick to try and grab the dough and got my hands coated in a sticky mess, so don’t do that. Knead the dough for 15 minutes and then place it in an oiled bowl to rise. It needs to rise for ~2 hours or until doubled in size.
Kneaded dough ball, so beautiful.All oiled up and ready to riseBIG boy
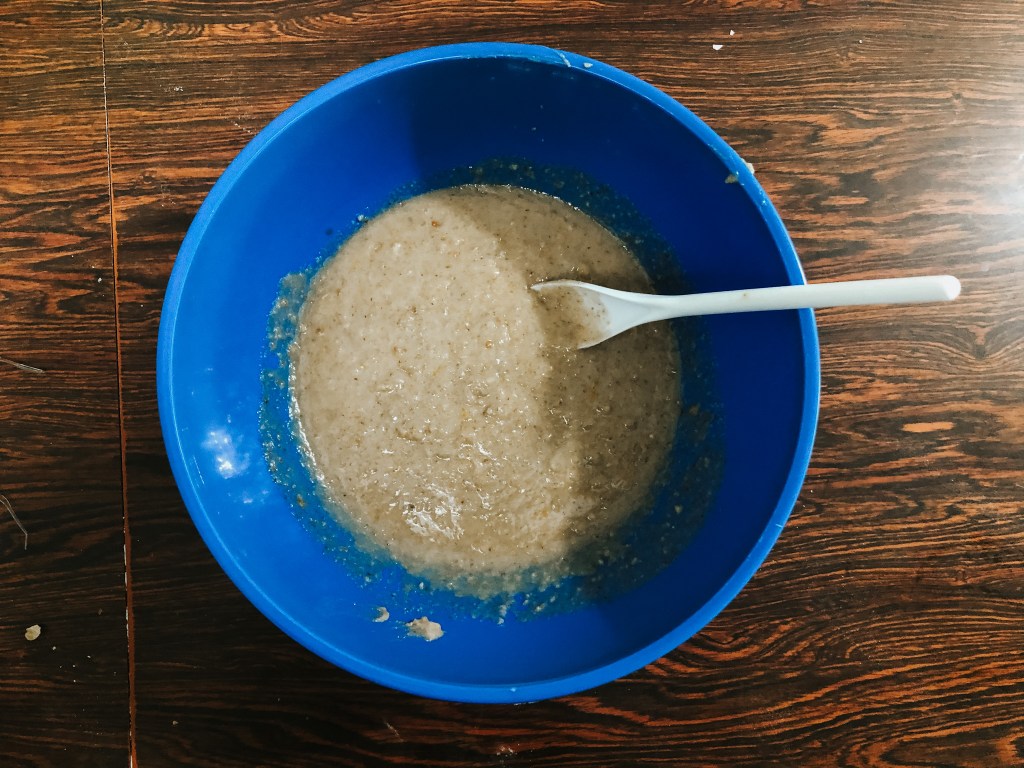
Time to make the tasty walnut filling. The hardest step to do without a food processor is up first: grinding up the walnuts. I almost threw in the towel on this part, but if you do have a food processor, this would be a piece of cake (or maybe a piece of potica??). Anyway, grind up your walnuts as best and as fine as you can, then, if your blender sucks, dump it all onto a cutting board and use a potato masher to get the bigger chunks. Set aside the walnuts and in a sauce pan melt the butter. add milk, honey, and sugar, bring the mixture to a boil, and then pour the hot mixture over the crushed walnuts. Add vanilla and grated orange peel, mix, and allow to cool. I would say I probably added a bit too much orange peel; The recipe calls for the grated peel of 1/2 an orange, but I bought a REALLY big orange. Maybe go easy on the orange peel unless you want a very citrus-y flavor. The last step for the filling is to beat the egg whites until they’re stiff and then fold them into the cooled mixture.
Oatmeal-lookin’ walnut filling mixture
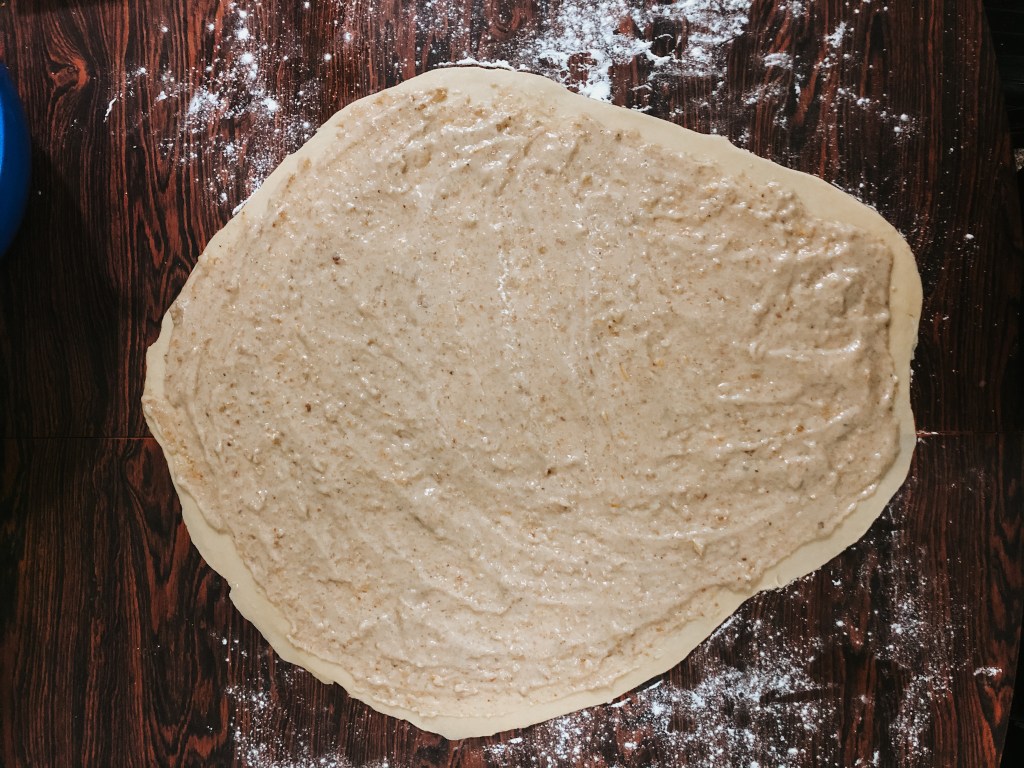
Now you roll the dough out and dump the nut filling onto it. The original recipe said to roll it out to a “50 x 32 inch” rectangle, so I just kind of rolled it out to however big I wanted. The part where I roll up the mixture probably would have gone a bit smoother if my dough looked more like a rectangle and less like an egg, but oh well. Don’t forget to sprinkle on some cinnamon before rolling it up!
Walnut filling all spread out onto my dough
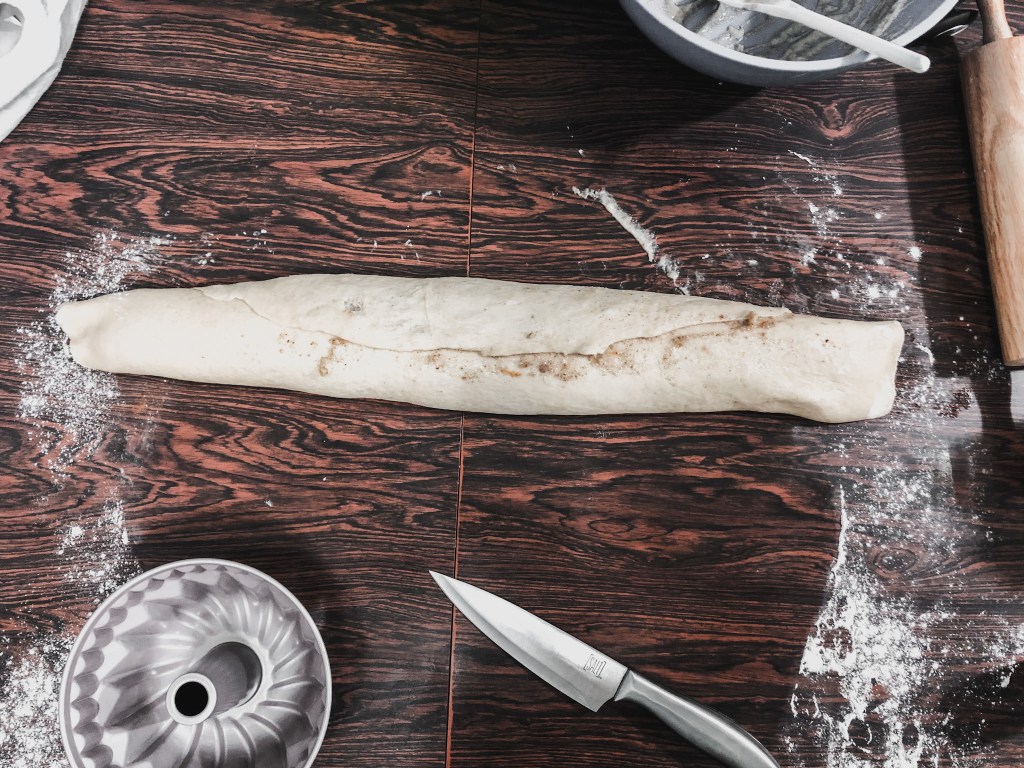
The directions say to start rolling from the long side, but for some reason I aparently liked the idea of rolling from the short side (?). You’re also supposed to prick the dough every roll to release any air pockets, but I did not do that either. I really just winged this step and rolled it to the best of my ability.
All rolled up. Kind of want to frame this image in my house.
FINALLY YOU ARE DONE. Cut that dough log to the size of your (greased) pans, slap them in there, and cover them and let them rise for another hour. Bake in a 325 degree (Fahrenheit) oven for 1 hour and violá she’s done. Nice and golden brown and delicious.
Little dough boys after risingCrispy on the outside, soft in the middle
How’d it Taste?
Sweet and delicious and with a great texture; I think I nailed it if I do say so myself. Mine actually tasted VERY orange-y, which I don’t personally mind, but I’m not sure if that’s what the recipe was going for. I can definitely see how the orange would balance out the other flavors, but it stood out a lot in my potica. Maybe buy an orange that isn’t the size of your head and you should be fine to follow the recipe as is. I think I will definitely be trying this recipe again for our next Christmas since that’s a holiday potica is traditionally made on. All in all, if you have the proper tools to make this, it’s actually pretty easy, and if you don’t…well…you may end up getting your spoon chipped up in the blender blade trying to push those walnuts down.
The Recipe (cut in 1/2)
Ingredients
Yeast: 1/2 large cake compressed yeast (1oz.) – I subbed this for 2 1/4 tsp instant yeast 1/4 cup lukewarm milk 1-1/2 tsp sugar
Walnut Filling: 1 pound walnuts (ground fine) 1/2 stick butter 3/4 cups milk or half and half cream 1 cup sugar 1/4 cup honey 1-1/2 tsp vanilla Grated peel from 1/2 orange or 1/2 lemon 3 egg whites Cinnamon
Directions
Dissolve yeast in milk; add sugar and combine.
Cover and let rise in warm place, about 10 minutes.
Scald milk in sauce pan; add butter. Cool to lukewarm.
In small electric mixer bowl, beat egg yolks, sugar, salt and vanilla until lemon-colored.
In large bowl, sift 1-2 cups flour.
Pour mixtures of prepared yeast, milk, butter, eggs and sugar into mixing bowl with 3 cups of flour; beat with electric mixer until smooth and elastic.
Keep adding flour and mixing with a wooden spoon until of consistency that dough can be handled without sticking.
Place on floured board and knead for about 15 minutes, adding flour as needed, to make a non-sticking dough.
Place dough in well-greased bowl; turn to grease top.
Cover and let rise in warm place for about 2 hours until double in bulk.
Grind walnuts in food chopper with finest blade.
Melt butter in large saucepan.
Add milk, sugar and honey; cook to rolling boil, taking care not to let it boil over.
Pour hot mixture over walnuts. Add vanilla and grated peel. Mix thoroughly and allow to cool.
Beat the egg whites until stiff and fold into the cooled nut mixture.
Grease well the loaf pans.
Roll out dough on table, sprinkled well with flour.
Spread cooled filling evenly over entire dough, sprinkling generously with cinnamon. (If desired, raisins may be added at this point.)
Start rolling up dough by hand from the wide side, stretching the dough slightly with each roll. Keep the side edges as even as possible. Prick roll about every several turns with a thin knitting needle or cake tester to help eliminate air pockets.
With edge of flat plate, cut desired lengths. Seal ends more securely by gently pulling dough down to cover ends and tucking underneath when placing in pan.
Cover and let rise in warm place until double, about one hour.
Bake in preheated 325-degree oven for 1 hour until medium brown.
If a glossy top is desired, brush each loaf with 1 egg yolk beaten with 1 tablespoon milk 15 minutes before potica is done.
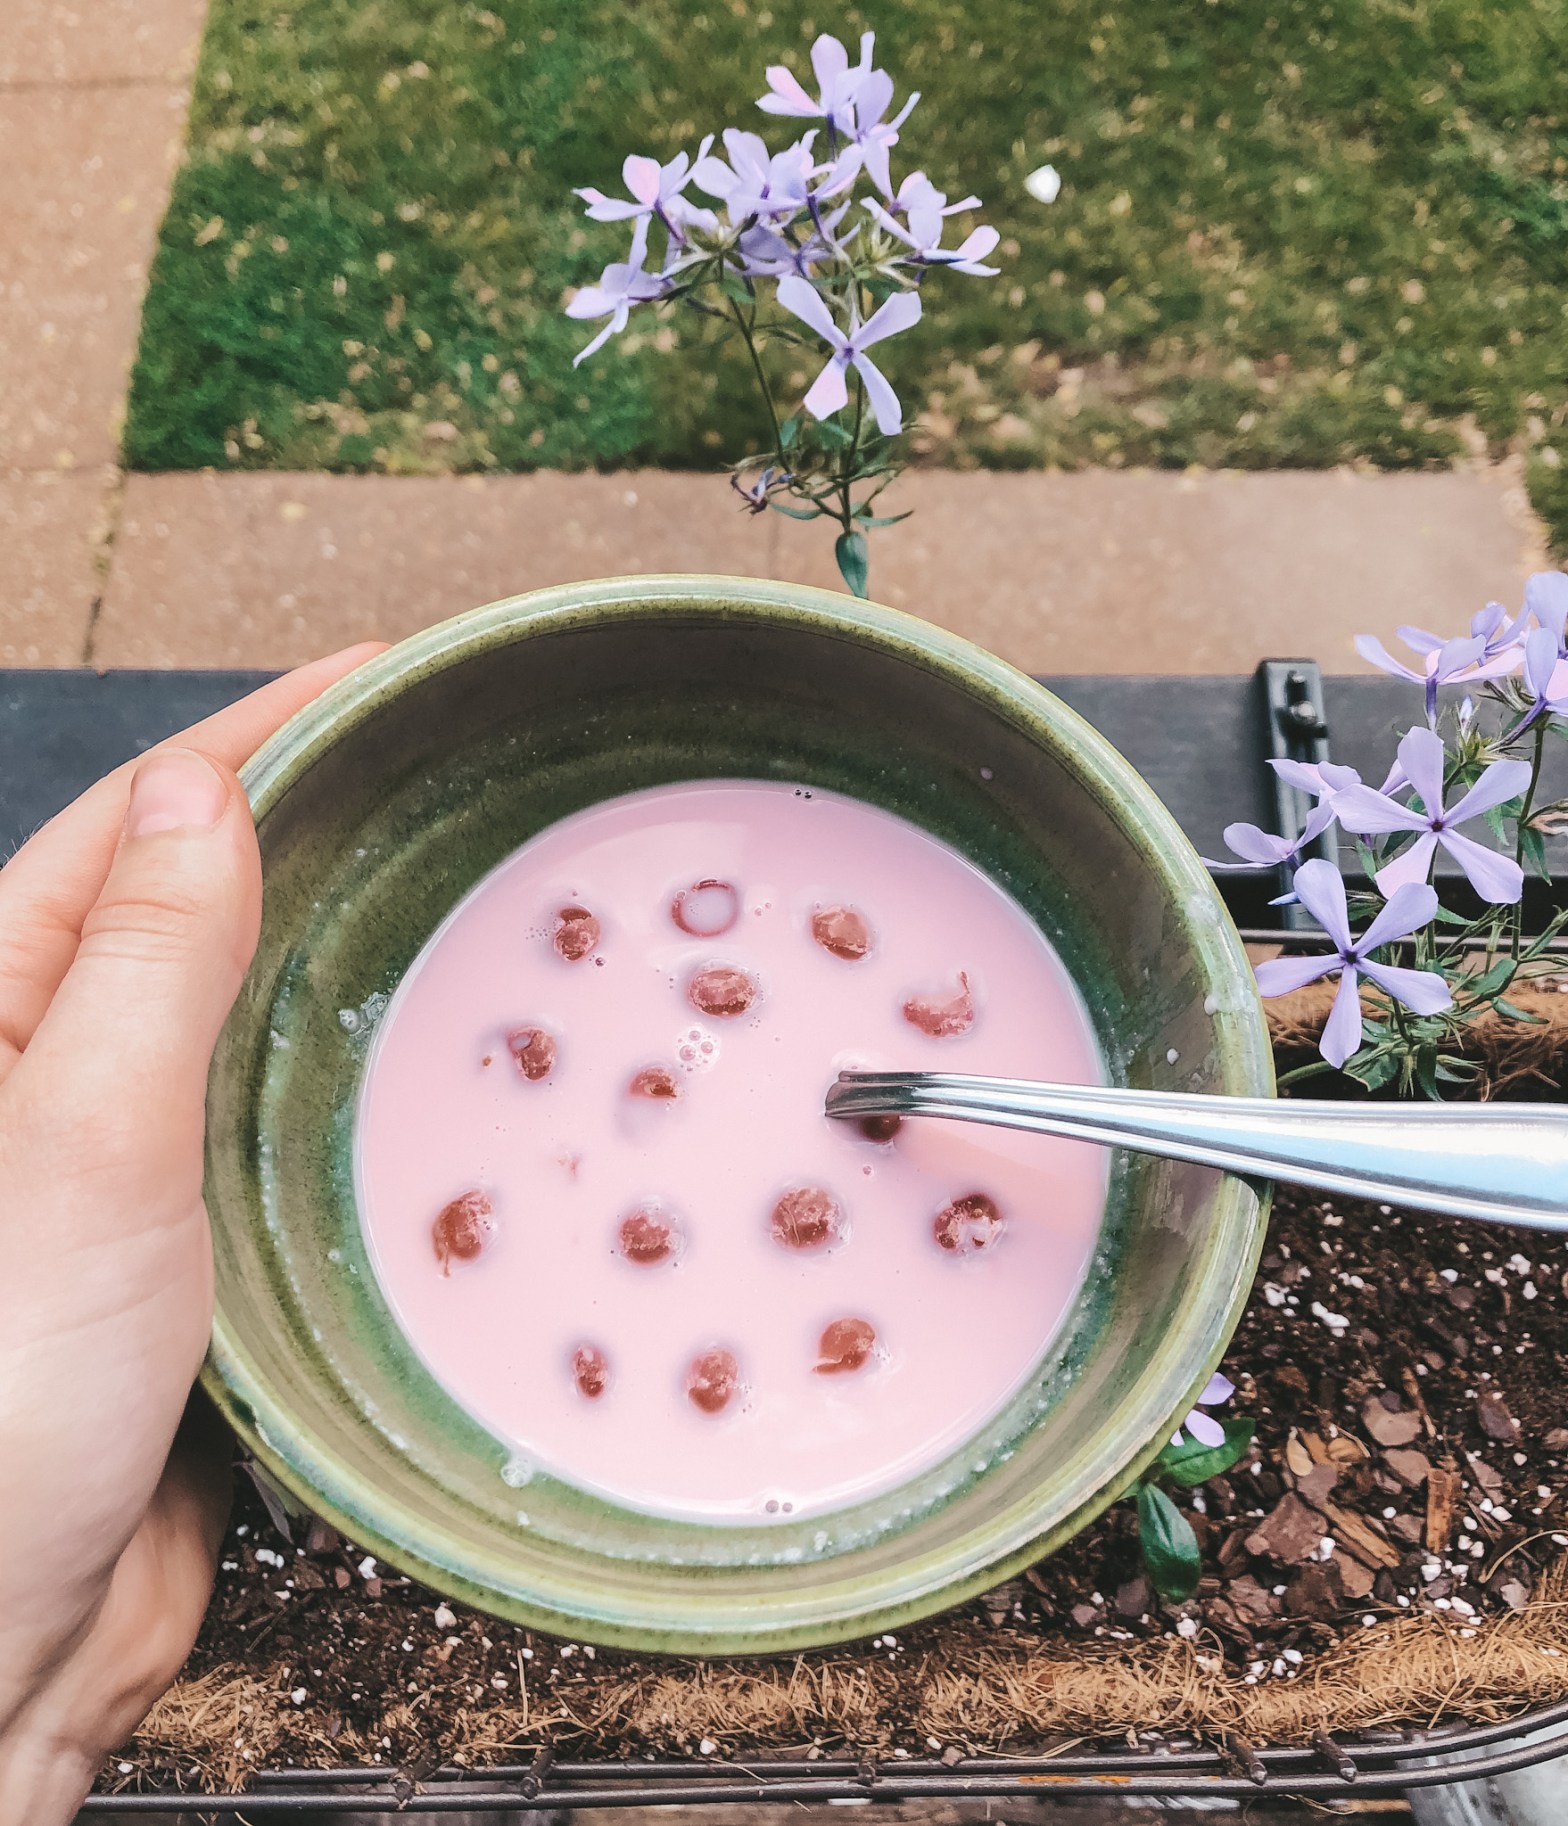
Hideg Meggyleves (Medj Leh-vesh), or cold sour cherry soup, is a popular summer soup from Hungary. I was intrigued by this dish because I had never heard of a cold soup. Honestly, why not just drink it out of a glass and call it a “punch?” I have so many questions, but regardless, I had to make it.
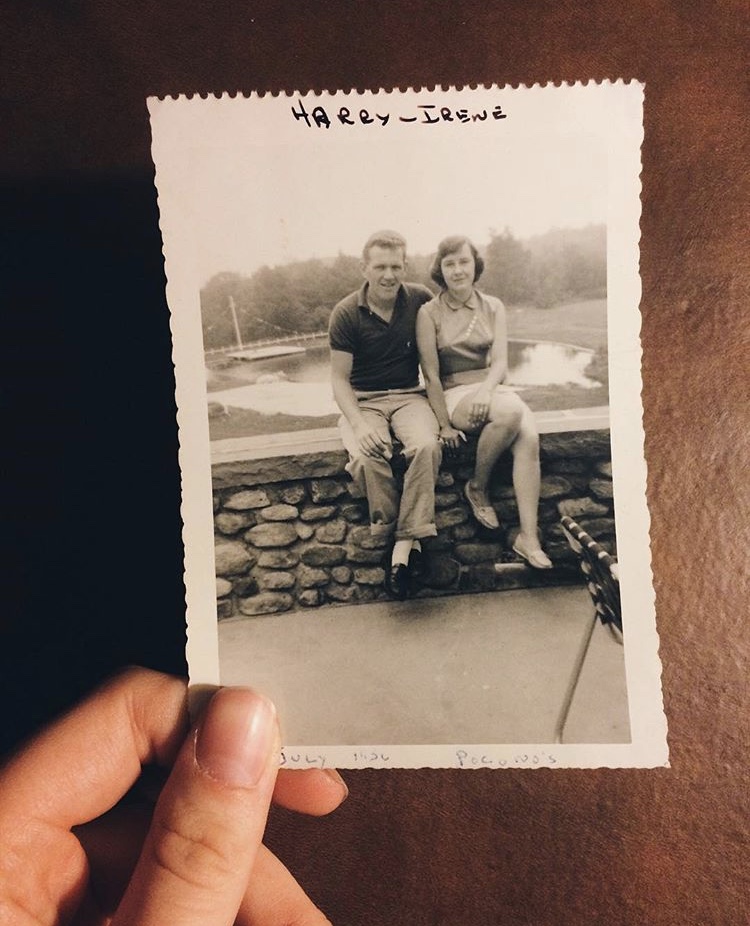
If you hadn’t noticed yet, hideg meggyleves is a homage to my Hungarian ancestry which comes from my maternal grandfather; his mother was born in upper Hungary. I still don’t have my ancestry results yet, so I’m still just using the ancestry.com database to look at my family tree. My Papa was a bit of a mystery to me, so I was especially excited to learn a little about him. He didn’t ever talk about himself to the grand-kids and I always just assumed that he was German (the last name “Gaber” sounded German enough, right?). I visited nearly every summer until he passed in 2012 when I was 15 years old and I still didn’t know a thing about him. I also could not find much about him on ancestry.com, but after my grandmother passed in 2017, my sister and I were helping clean out their house and found an entire box of cards that my Papa had written to my Nana while he was serving in WWII. We also found his military jacket from the war and a lot of cute Polaroids of them together like this one:
My Nana and Papa in Poconos, 1956.
Let’s Make the Thing!
A variety of cold soups are popular in Hungary, but sour cherry is the most traditional. Since cherries are not yet in season here in Missouri, though, I had to make due with a less traditional method and materials. A lot of recipes made it seem like a sin to use canned cherries, but that’s what I went with; many recommend either fresh or frozen. However, everyone has their own version of the recipe, so you can really make it your own. If you want to try a more traditional recipe, I recommend this one from budapestcookingclass.com, which I will likely try when I can get ahold of fresh cherries. The recipe that I used this time is from soupsong.com and calls for the pictured ingredients.
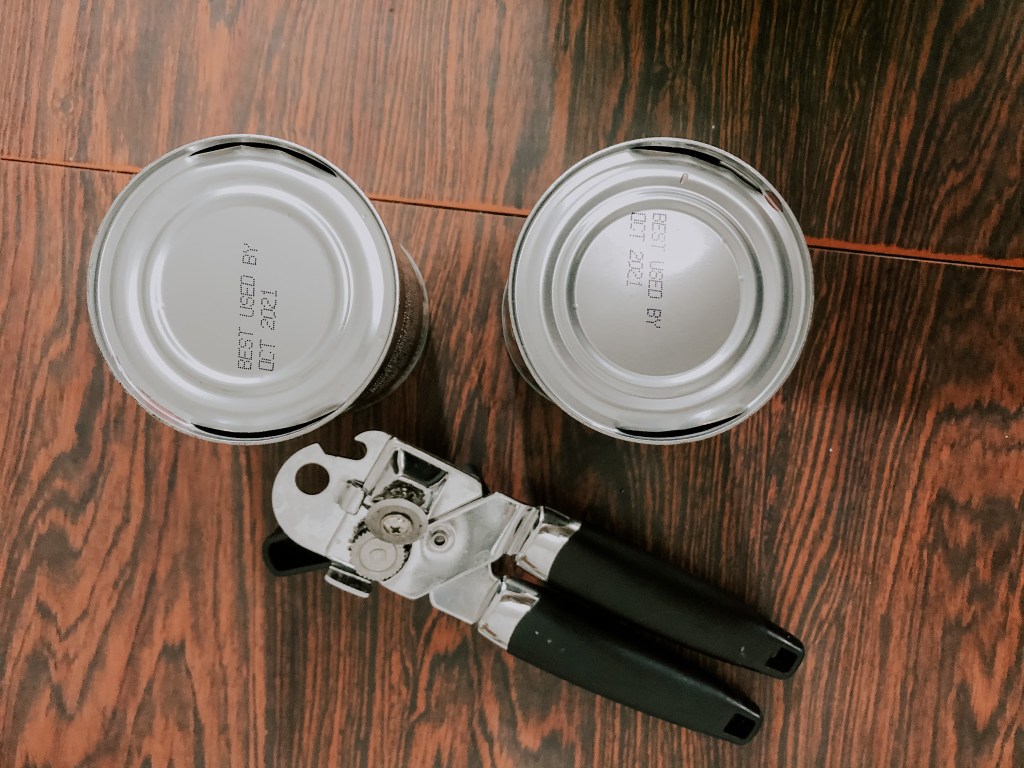
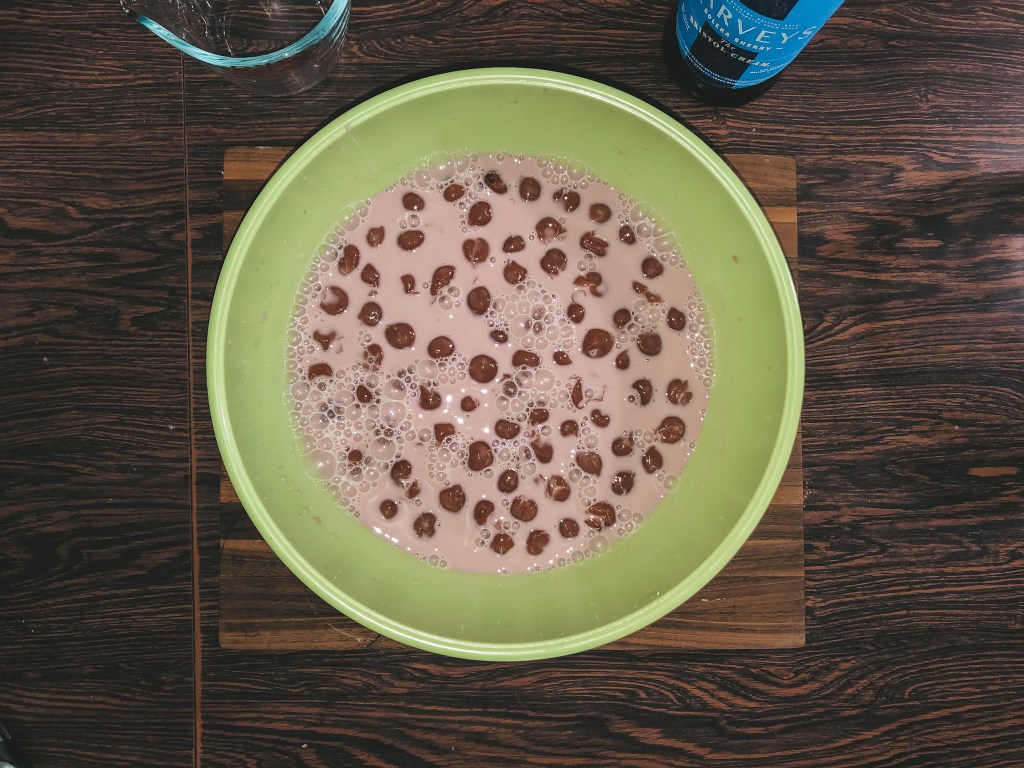
This version is very easy to make since you do not need to heat anything over the stove; you just whisk it all together and stick it in the fridge! First, whisk the cherry juice, sour cream, wine, and sugar until the sugar has dissolved. The recipe actually calls for “superfine” sugar and recommends you whirl it in a blender, but that didn’t go so well in my big ole blender. I just whisked the sugar in as is. Another tip that I can offer is to cut two holes in the top of your can and dump the cherry liquid out of one side instead of messing with straining the liquid out. I don’t know if this is actually a trick or just a well known method to get liquids out of cans, but if you didn’t try it before then maybe you should!
Cut two holes in the can and pour the juice out of one side. The other hole is to let air out while you pour.Everything all mixed together, ready for the fridge!
After whisking, stir the cherries in and cover and chill in the fridge for 3-4 hours and you’re done!
How’d it taste?
If you’re wondering whether or not you want to make this recipe, the answer is yes. The flavor upfront is more sweet and then you get the sourness from the cherries after that. It was definitely very refreshing with it being cold, and I can see why it’s a common summer treat in Hungary. Plus this version of the recipe has wine in it, so you could make it even more boozey and enjoy it that way, too 😉
The Recipe
Ingredients
2 1-pound cans of sour, pitted cherries, undrained
1 cup sour cream (“lite” is fine)
1/4 cup superfine sugar (which you can make in a blender or food processor)
1/4 cup tawny port or cream sherry
Directions
Whisk the cherry juice, sour cream, sugar, and wine in a bowl until the sugar is dissolved.
Stir in the cherries.
Chill for 3-4 hours.
When ready to serve, ladle into small bowls and just flick a little superfine sugar over each one. Serve immediately with silver spoons.
Growing up, I had only ever known my maternal grandparents. My paternal grandparents had already passed before I was born. I could only see my “Nana” and “Papa” during the summers when we would visit them in Connecticut, which is where my mother is from. I was a bit of an ornery child; always instigating fights with my sister and being quick to the sarcastic comments. My Nana was always the first to tell me to “stop being a pain in the ass” which I thought was hilarious. We’d go back and forth poking at each other and always end up laughing and smiling together by the end of it. I can hear her laugh by just writing about her. My Nana passed in 2017 and making this recipe made my heart feel a little bit closer to her.
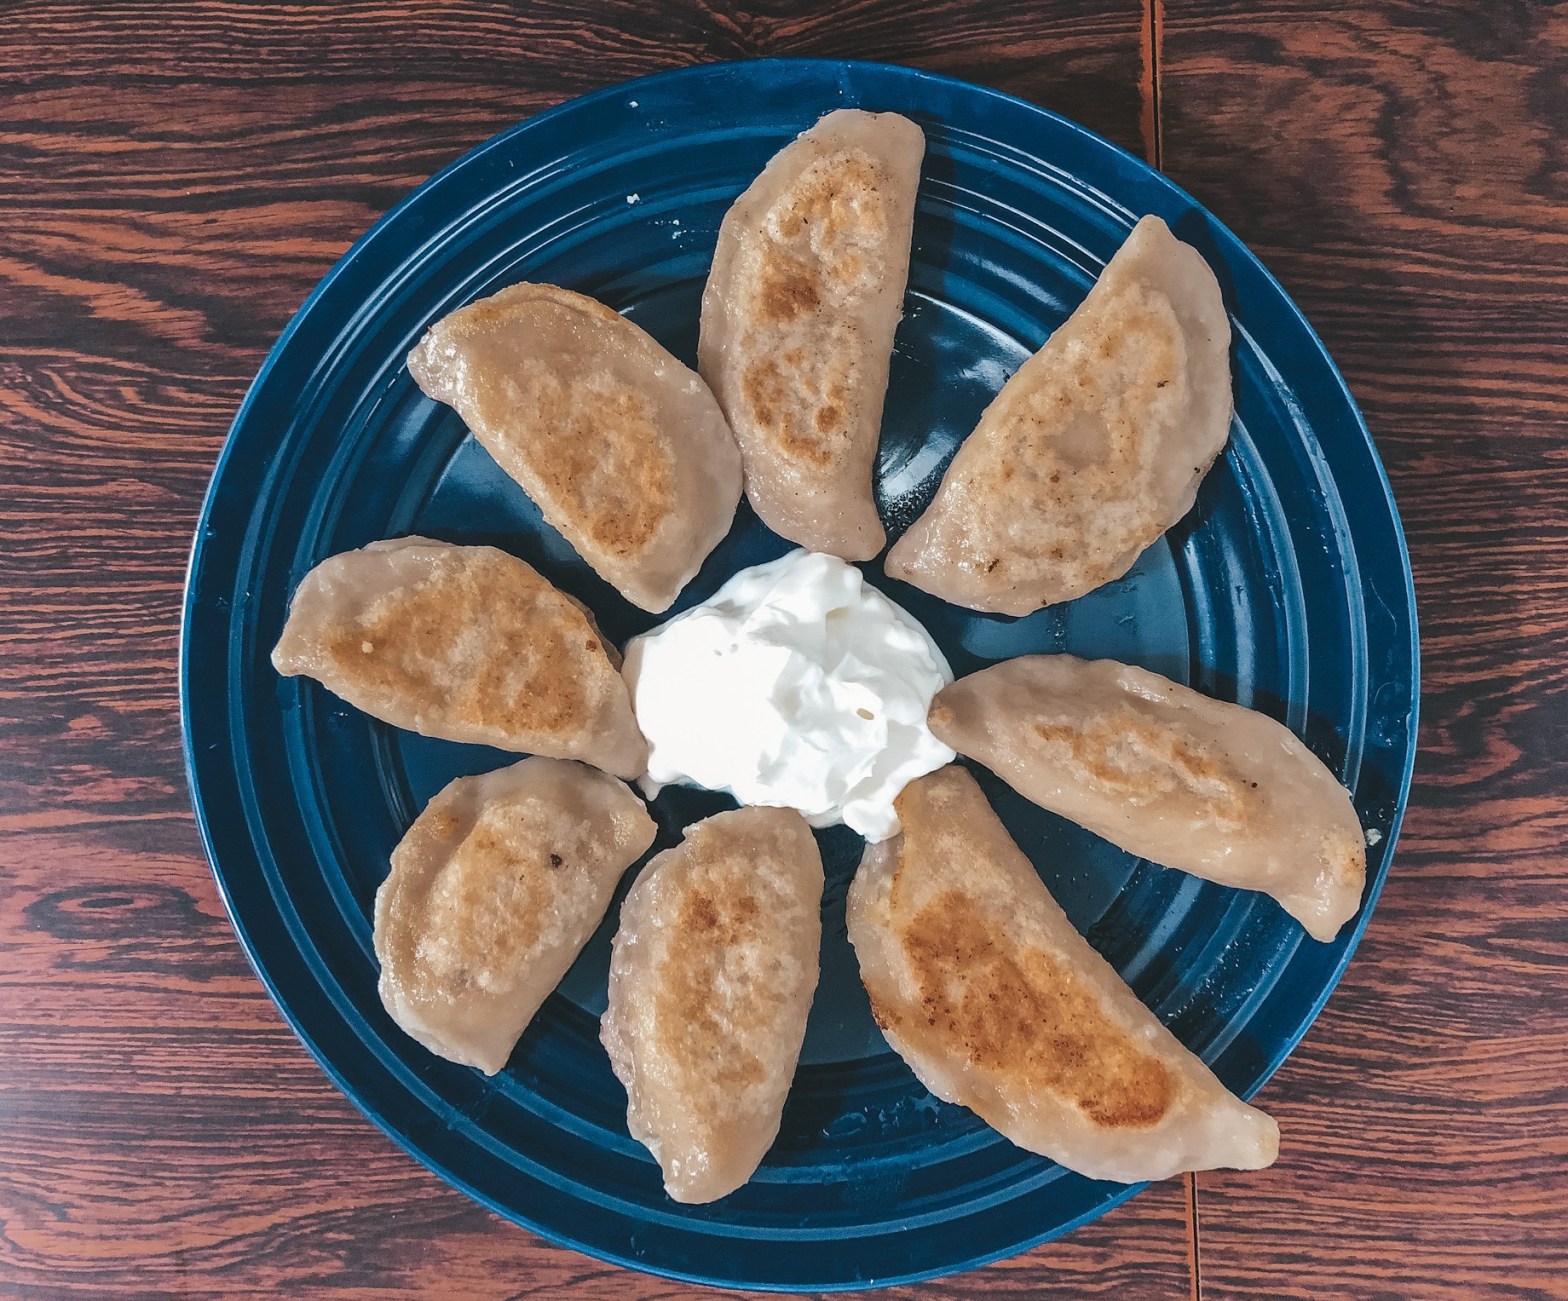
I decided to go ahead and start with Poland before even receiving my DNA test kit. I had already known very well that my Nana was polish, a maiden name like Zakrzewski kind of gave it away. She actually went by Yacheski, but I learned on ancestry.com that Zakrzewski was her true maiden name; It is so wild (and a bit sad) that people felt like they had to change their last names when they came to the United States. I already knew a few polish food items, but I knew that I HAD to make polish pierogis as my first “cooking through my heritage” dish. A few sources related them to dumplings, but they look more like raviolis to me. They can be stuffed with SO many things from fruit to potatoes to meat and onions. Anyone can love pierogis because you can fill them with anything! I digress, but you definitely need to try these pierogi recipes for yourself.
Making the Pierogis
The main source that I used to learn how to make traditional polish pierogis was tastingpoland.com. They have a really amazing tips and tricks page with descriptions on how to form them, what traditional eastern European fillings really are, and how to actually make traditional dough (without eggs!). I recommend checking that out if you’d like to learn a bit more; they have other recipes there too! I also used two other sources for this recipe because they have videos; sometimes you just need that extra visual to really understand what the heck the directions are trying to say.
I decided to make pierogis with two different fillings, meat and onions, and potato and ricotta. For the meat and onion, I combined this recipe from tastingpoland and this recipe from cooking-the-world with the latter recipe having a video to follow. For the potato and ricotta, I used a video from The Polish Chef on youtube. He makes a dough in the video which you are free to follow, but I followed a dough recipe from tastingpoland that does not have eggs in it (results in a less tough dough after cooking and is more traditional).
I started by making the fillings (meat and onion and potato and cheese) and then I went on to make the dough! here’s a little tutorial on how I made the pierogi dough:
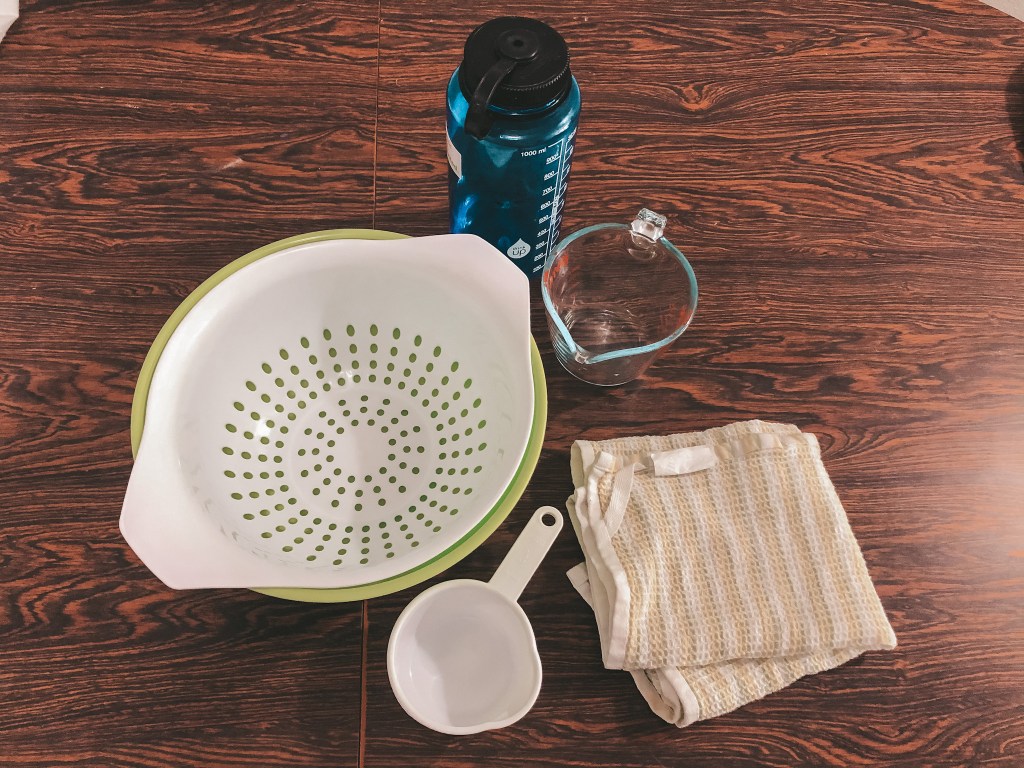
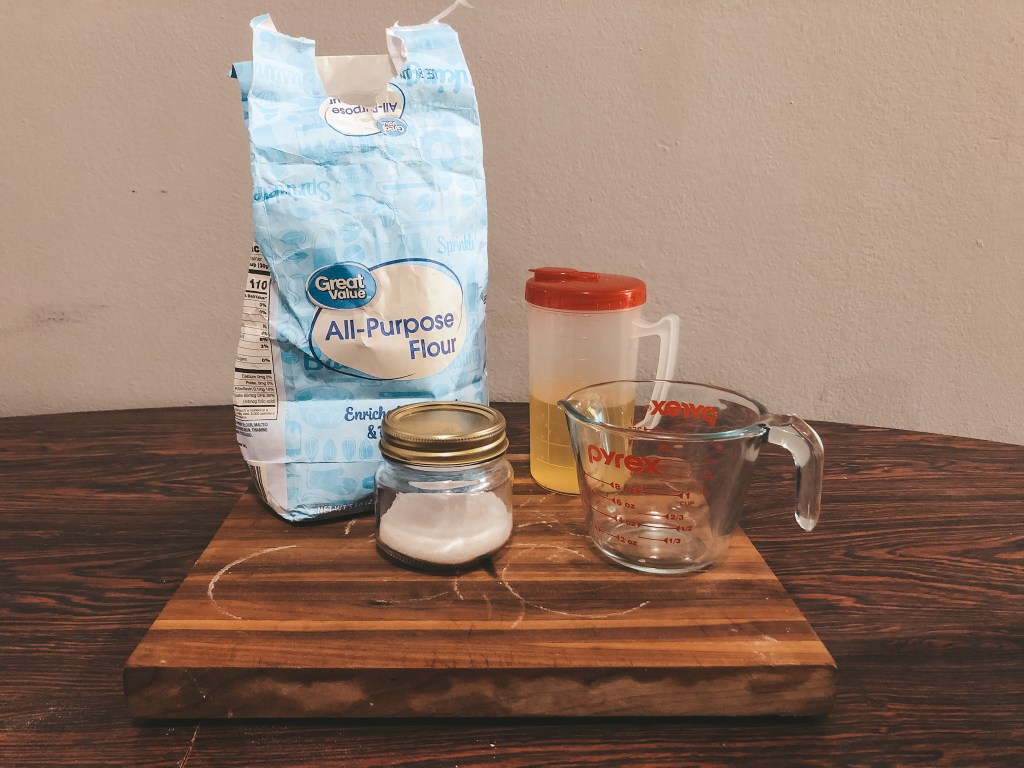
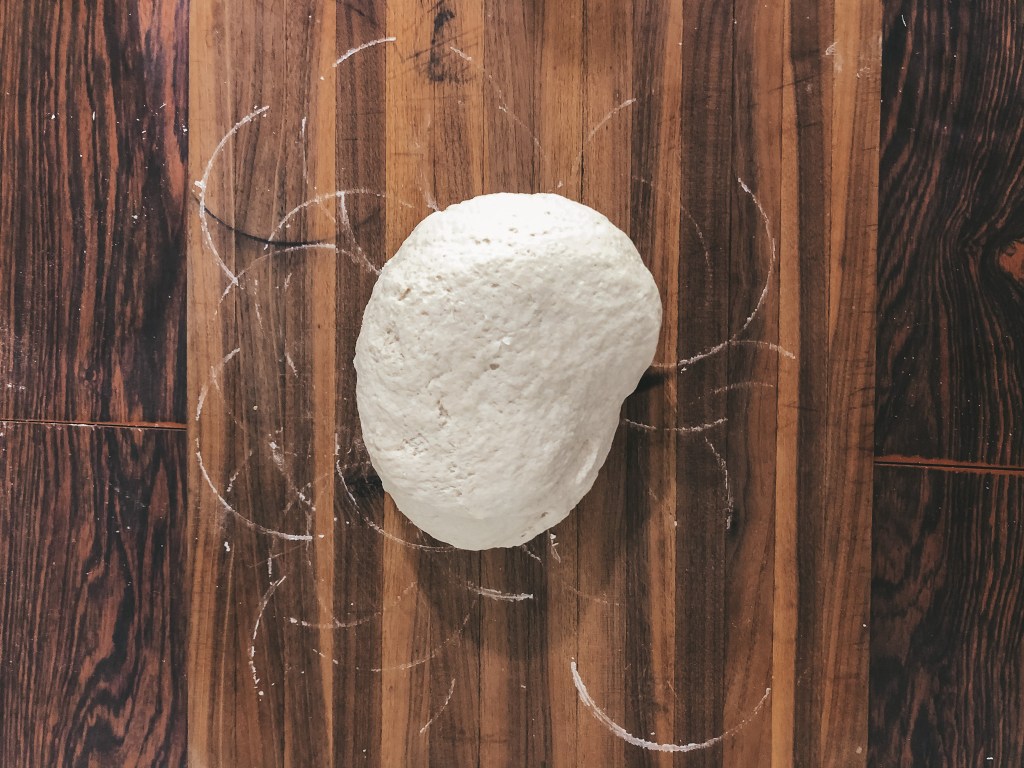
First, I gathered the ingredients and semi-appropriate materials. I say semi-appropriate because it calls for a flour sifter and a rolling pin…but I have neither of those. You can tell that I am a professional here. I made do with a pasta strainer and a 32 oz nalgene water bottle. I definitely do not recommend the water bottle over the rolling pin…my hands hurt.
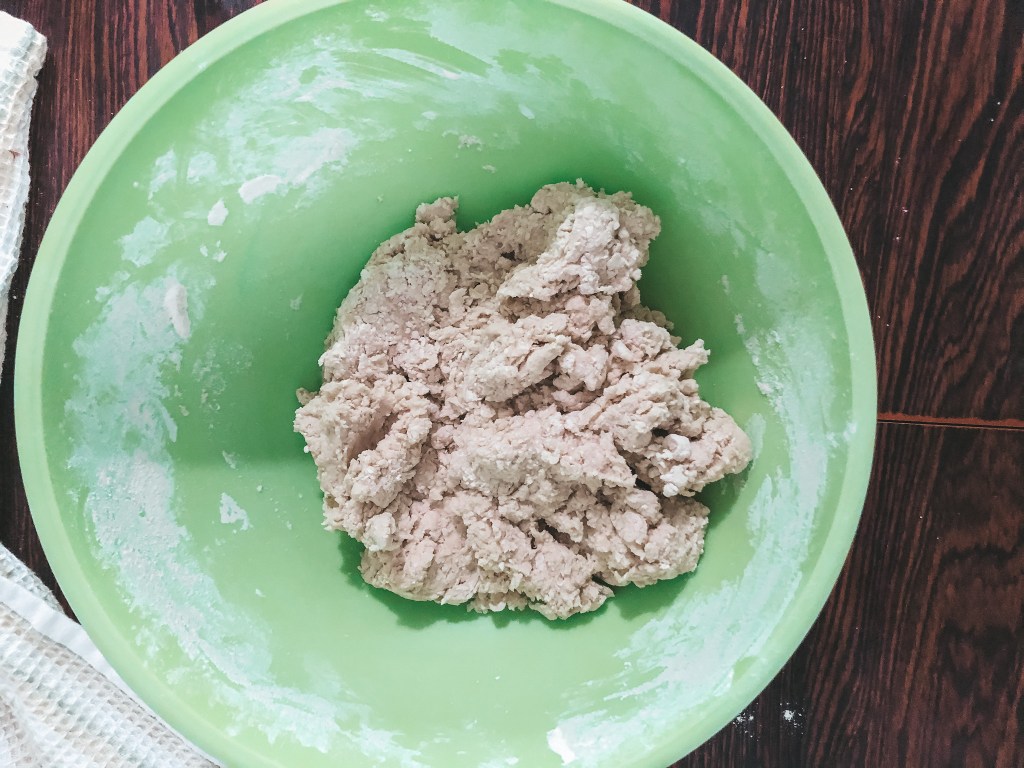
Now let’s get into the fun stuff. Sift the flour through your sifter (or pasta strainer). Mix the dry ingredients (sifted flour and salt) and then pour in 0.75 cup of boiling water. I put mine in the microwave for 1 minute and called it hot enough. The “dough” looks a lot chunky at this point, but I was not about to mess the recipe up this early, so I just followed the directions and covered the bowl for 5 minutes.
Dough after mixing in 0.75 cups of boiling water
And cover!
After 5 minutes, uncover and mix in the 0.25 cups of cold water. Cover again for 15 minutes this time. After 15 minutes is up, uncover, add the vegetable oil, and start kneading! Knead until it’s a uniform mass (~5 minutes). The dough should be stretchy and a bit adhesive to itself.
Dough after cold water is addedViola! A uniform dough mass!
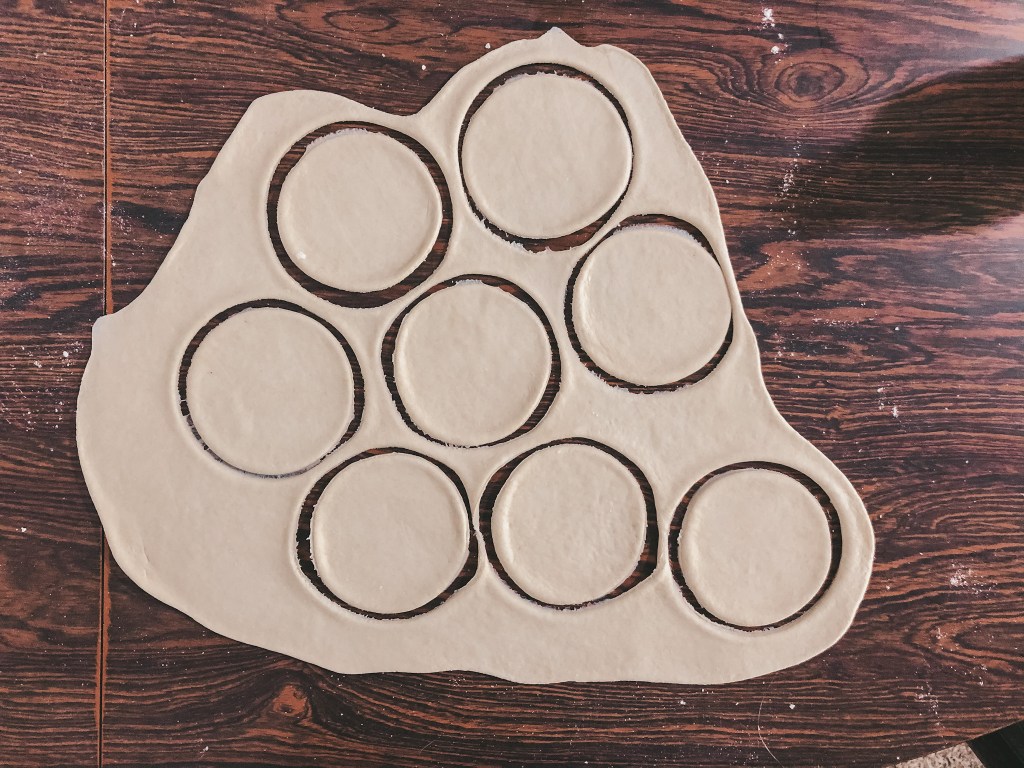
Now spread some flour on your surface and roll out the dough to ~2-3 millimeters thick, and cut out circles using a drinking glass. Mine had an opening that was ~8.5 centimeters in diameter.
Grab your filling and scoop about 1 tbsp of filling (depending on your dough circle size) onto a dough circle. Fold over so it is now a half circle and seal the edge by pinching it. Be careful as to not pinch the filling in the edge or the pierogi will open up while it’s cooking. They’re ready to be cooked!
A few big bois and a few little bois, tasty either way
Pierogis are cooked by boiling and then frying. Traditionally, potato pierogis are not fried after boiling, but I fried mine because I like them that way. Make sure you stir the boiling pierogis frequently so that they do not stick to the bottom of the pot! After they begin to float, start a timer for 3 minutes, then remove after time’s up.
All fried up with some sour cream
After I’ve made the pierogi, I like to eat them with sour cream, which is a traditional topping. Some enjoy them with ketchup, mustard, or other sauces, which are not traditional, but feel free to enjoy them however you see fit!
The Recipes
Traditional Pierogi Dough
Ingredients:
3 cups of wheat flour (all-purpose)
half a teaspoon of salt
0.75 cup of boiling water
0.25 cup of cold water
half a teaspoon of oil
Makes ~30 pierogi
Instructions:
Pour 3 cups of wheat flour into the bowl. Pour the flour through a sieve to separate any lumps and in order to aerate the flour. Thanks to the latter, your pierogi dough will be softer and more delicate in flavor. Then add half a teaspoon of salt.
Pour 0.75 of cup of boiling water into the bowl, while vigorously stirring the mixture with a fork or wooden spoon. At this stage, it is normal that lumps of flour will form and surface – crumble them down with the fork. Cover the bowl with a cotton cloth and set aside for about 5 minutes.
After 5 min, add a quarter of a cup of cold water, give it a stir, and crumble down the lumps (if any). Once again cover the pierogi dough with a cotton cloth, but this time set is aside for 15 minutes.
After 15 min, add half a teaspoon of vegetable oil (canola, sunflower or olive oil). Roll up your sleeves – it’s time for some work. Knead the pierogi dough until it becomes a smooth and uniform mass. In general, it takes 5 to 10 minutes. When finished, the pierogi dough should be homogeneous, stretchy and a bit adhesive. I had to add a little bit more water to my dough as it was pretty stiff.
Now, the dough is ready to prepare pierogi. Roll out the dough on a pastry board (or simply on a table) until you reach the thickness of about one-tenth of an inch (2-3 millimeters). However, before you start rolling it out, you should flour the pastry board. Thanks to that the pierogi dough won’t adhere or tear. However, remember that one side of the dough should remain clean. You want it to cling on to itself while folding pierogi.
Cut circles out of the pierogi dough by using a cup. Place the filling in the middle of every circle and fold it to form pierogi.
Collect scraps of pierogi dough, knead again, roll out and repeat steps 5-7.
Meat and Onion
A few things that I did differently than the recipe I’m about to show you: I doubled the amount of meat and I forgot to put in the two eggs, oops. I only doubled the meat because the store only had 2lb packages and I knew I would waste it if I didn’t use it.
Ingredients:
0.5 kg of beef (or about 1 lb) – I used beef brisket
0.5 tsp salt
4 bay leaves
5 grains allspice
3 carrots
1 parsley stem
1 leek
1 celery stick
1 yellow onion
butter or oil for frying
1 roll (yes, just any sort of bread roll)
parsley leaves
two eggs
salt & pepper
pierogi dough
Instructions:
Cut beef into chunks (~2 inch cubes). Boil water and then season water with allspice grains, 0.5 tsp salt, and bay leaves. Put meat into boiling water. You can probably reduce the heat a bit so the water stays hot but not boiling (Medium-high)
Prepare wloszczyzna vegetables: peel and cut into small stripes (I just cut them into discs and then cut the discs in half) three carrots, one parsley ( I just put one whole parsley stem in the pot), one leek and a celery stick. Put vegetables into stock with meat and leave gently cooking on half an hour ( I just left them cooking until the meat was cooked through). I used fresh vegetables, but the original recipe preferred frozen.
While the meat is being cooked with vegetables, peel and dice yellow onion.
Fry onion on the frying pan with the addition of butter, until it lightly browns itself. I used 4 tbsp of unsalted butter.
Take the meat out of stock and tear into smaller pieces. I also removed the veggies and put them in the bowl with the meat.
Drop the roll into the pot of stock and leave it until it’s completely saturated. Then take it out of the bowl, squeeze it out, and add to bowl of meat & veggies.
Add the fried onion to the meat bowl and stir everything together.
Grind the blend of onion, meat, veggies and roll in a meat mincer (I used a blender, you can also use a food processor.)
Chop parsley leaves up and add to stuffing after blending.
Break two raw eggs into a meat mixture.
Add salt and grinded black pepper. Mix. Season to taste.
If your stuffing is too dry add some stock (the liquid the beef was boiled in). You don’t want your mixture to be too wet, though, or it will be hard to close the pierogis.
Now arrange this stuffing with teaspoon on pierogi dough circles and carefully squeeze them shut.
Boil pierogi in salted water. After they float to the surface, start a timer for 3 minutes (or cook until they become soft), then scoop them out.
Pan-fry the cooked pierogi. Use butter or sunflower oil. Fry pierogi on both sides – turning periodically. Fry pierogi, until they become firmly browned on both sides.
Potato and Ricotta
Ingredients:
3-4 russet potatoes
1 cup (8 oz) farmers cheese (or ricotta cheese)
0.5 tsp salt
0.25 tsp pepper
1.5 cups yellow onion (I just used 1 whole onion)
4 tbsp butter (for frying onion)
Instructions:
Boil russet potatoes for ~30 minutes or until soft
While potatoes are boiling, dice onion
Remove potatoes from water and allow to cool enough so that you can handle them. Remove skin and eyes from the potatoes. You can then either shred or mash the potatoes.
Add the salt, pepper, and ricotta (or farmer’s) cheese to the mashed potatoes and stir together.
Fry the onions in butter until golden and then add them to the potato mixture.
At this point, the mixture is placed in the fridge to cool so that it can cool (it’s easier to handle this way).
Make your dough
Place 0.5-1 tbsp of mixture onto each pierogi dough circle and seal.
Cook pierogi in salted water. After they float to the surface, start a timer for 3 minutes (or cook until become soft), then scoop them out.
Pan-fry the cooked pierogi in butter or oil. Fry pierogi on both sides – from time to time turning from side to side. Fry pierogi, until become firmly browned from both sides.
How to store Pierogi?
My favorite storage method is to freeze them! They last longer and they’re easy to just pop into some boiling water to heat them up and then fry. To prepare the pierogi for freezing, you will need to blanche them.
Freezing your pierogi:
Drop the raw pierogi into boiling water. Allow to cook until they float.
Once the pierogi are floating, scoop them out and immediately cool them in a bowl of ice water (this is blanching).
Dry the pieorgi off a bit and then place them onto a sheet pan and into the freezer.
After they are completely frozen, move them to a bag for more convenient storage.