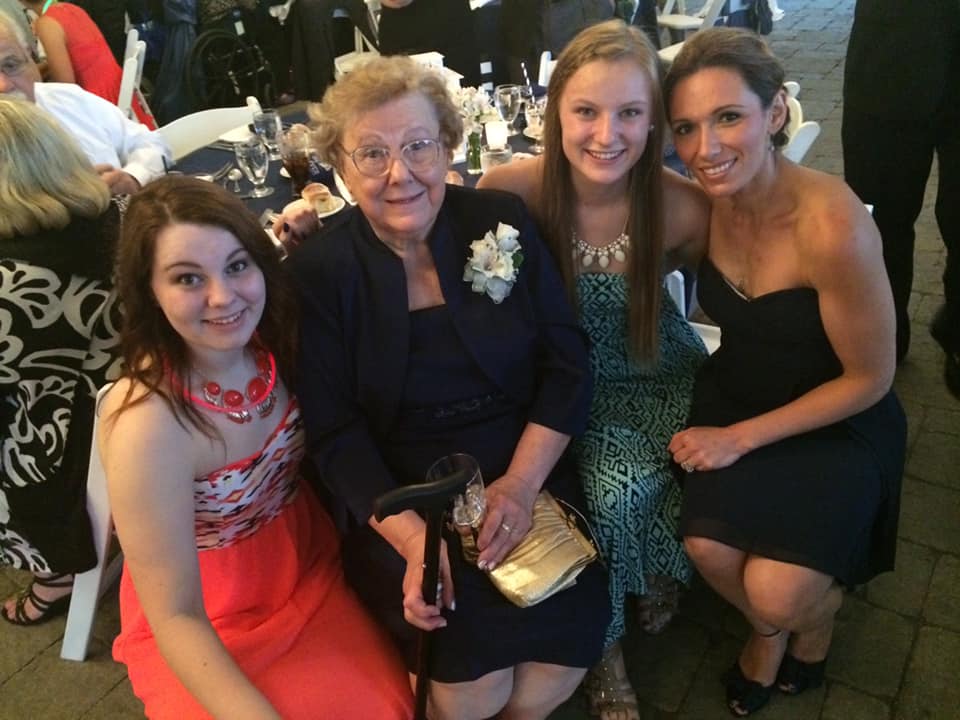
My Grandma
Growing up, I had only ever known my maternal grandparents. My paternal grandparents had already passed before I was born. I could only see my “Nana” and “Papa” during the summers when we would visit them in Connecticut, which is where my mother is from. I was a bit of an ornery child; always instigating fights with my sister and being quick to the sarcastic comments. My Nana was always the first to tell me to “stop being a pain in the ass” which I thought was hilarious. We’d go back and forth poking at each other and always end up laughing and smiling together by the end of it. I can hear her laugh by just writing about her. My Nana passed in 2017 and making this recipe made my heart feel a little bit closer to her.
I decided to go ahead and start with Poland before even receiving my DNA test kit. I had already known very well that my Nana was polish, a maiden name like Zakrzewski kind of gave it away. She actually went by Yacheski, but I learned on ancestry.com that Zakrzewski was her true maiden name; It is so wild (and a bit sad) that people felt like they had to change their last names when they came to the United States. I already knew a few polish food items, but I knew that I HAD to make polish pierogis as my first “cooking through my heritage” dish. A few sources related them to dumplings, but they look more like raviolis to me. They can be stuffed with SO many things from fruit to potatoes to meat and onions. Anyone can love pierogis because you can fill them with anything! I digress, but you definitely need to try these pierogi recipes for yourself.
Making the Pierogis
The main source that I used to learn how to make traditional polish pierogis was tastingpoland.com. They have a really amazing tips and tricks page with descriptions on how to form them, what traditional eastern European fillings really are, and how to actually make traditional dough (without eggs!). I recommend checking that out if you’d like to learn a bit more; they have other recipes there too! I also used two other sources for this recipe because they have videos; sometimes you just need that extra visual to really understand what the heck the directions are trying to say.
I decided to make pierogis with two different fillings, meat and onions, and potato and ricotta. For the meat and onion, I combined this recipe from tastingpoland and this recipe from cooking-the-world with the latter recipe having a video to follow. For the potato and ricotta, I used a video from The Polish Chef on youtube. He makes a dough in the video which you are free to follow, but I followed a dough recipe from tastingpoland that does not have eggs in it (results in a less tough dough after cooking and is more traditional).
I started by making the fillings (meat and onion and potato and cheese) and then I went on to make the dough! here’s a little tutorial on how I made the pierogi dough:
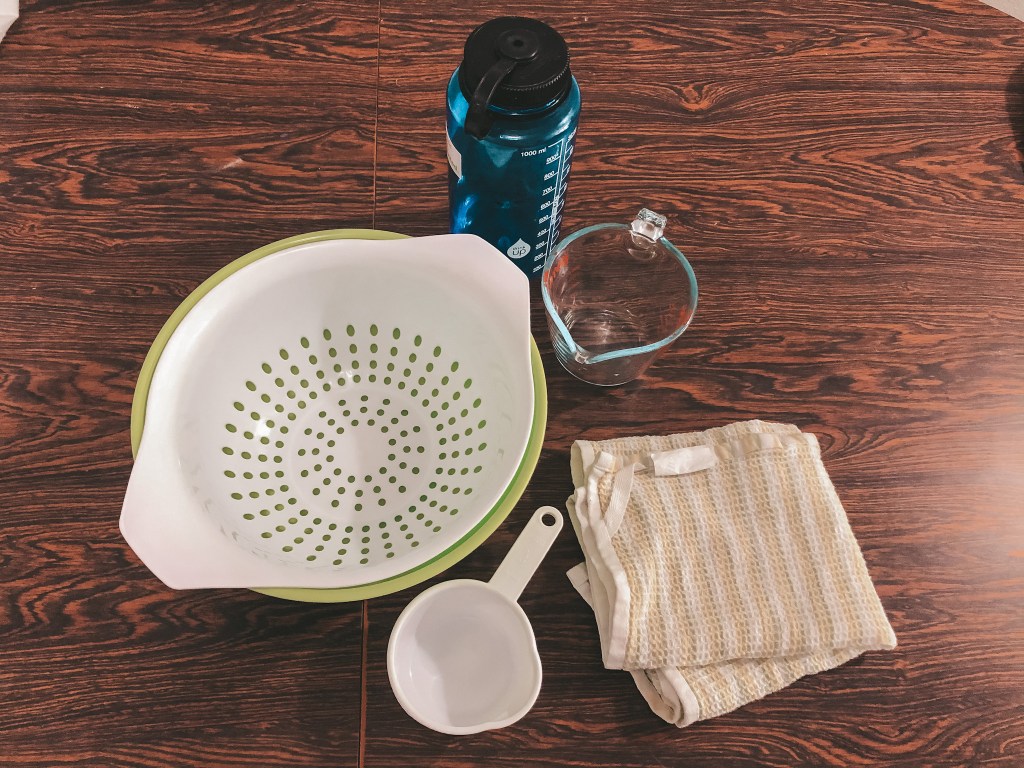
First, I gathered the ingredients and semi-appropriate materials. I say semi-appropriate because it calls for a flour sifter and a rolling pin…but I have neither of those. You can tell that I am a professional here. I made do with a pasta strainer and a 32 oz nalgene water bottle. I definitely do not recommend the water bottle over the rolling pin…my hands hurt.
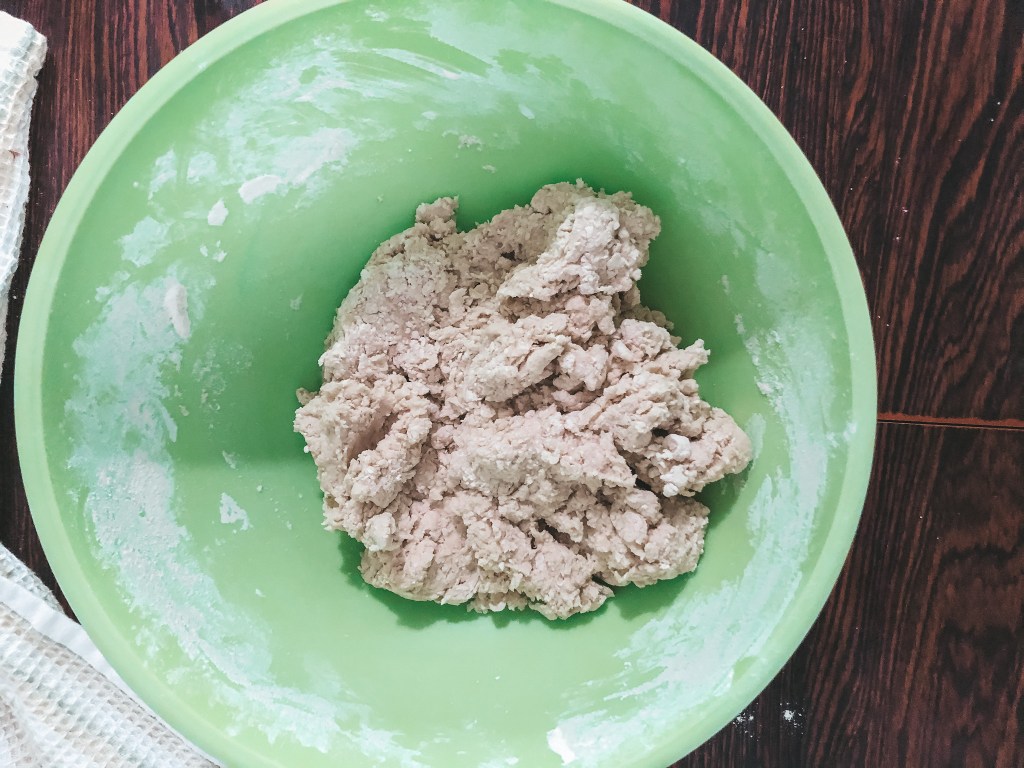
Now let’s get into the fun stuff. Sift the flour through your sifter (or pasta strainer). Mix the dry ingredients (sifted flour and salt) and then pour in 0.75 cup of boiling water. I put mine in the microwave for 1 minute and called it hot enough. The “dough” looks a lot chunky at this point, but I was not about to mess the recipe up this early, so I just followed the directions and covered the bowl for 5 minutes.


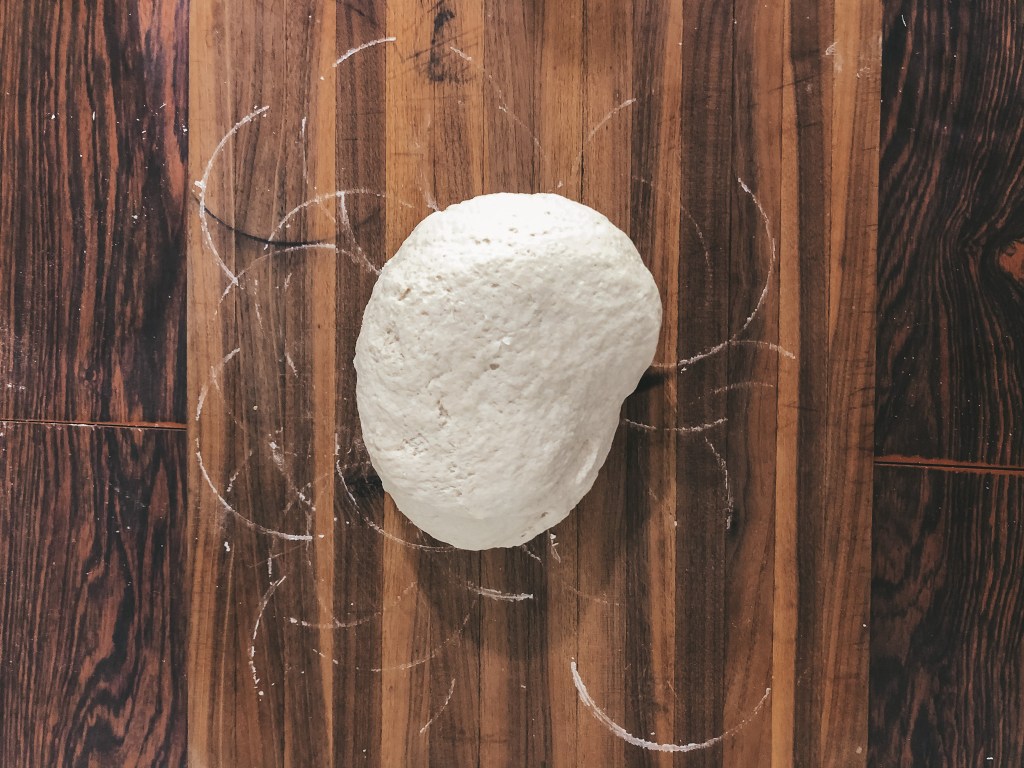
After 5 minutes, uncover and mix in the 0.25 cups of cold water. Cover again for 15 minutes this time. After 15 minutes is up, uncover, add the vegetable oil, and start kneading! Knead until it’s a uniform mass (~5 minutes). The dough should be stretchy and a bit adhesive to itself.
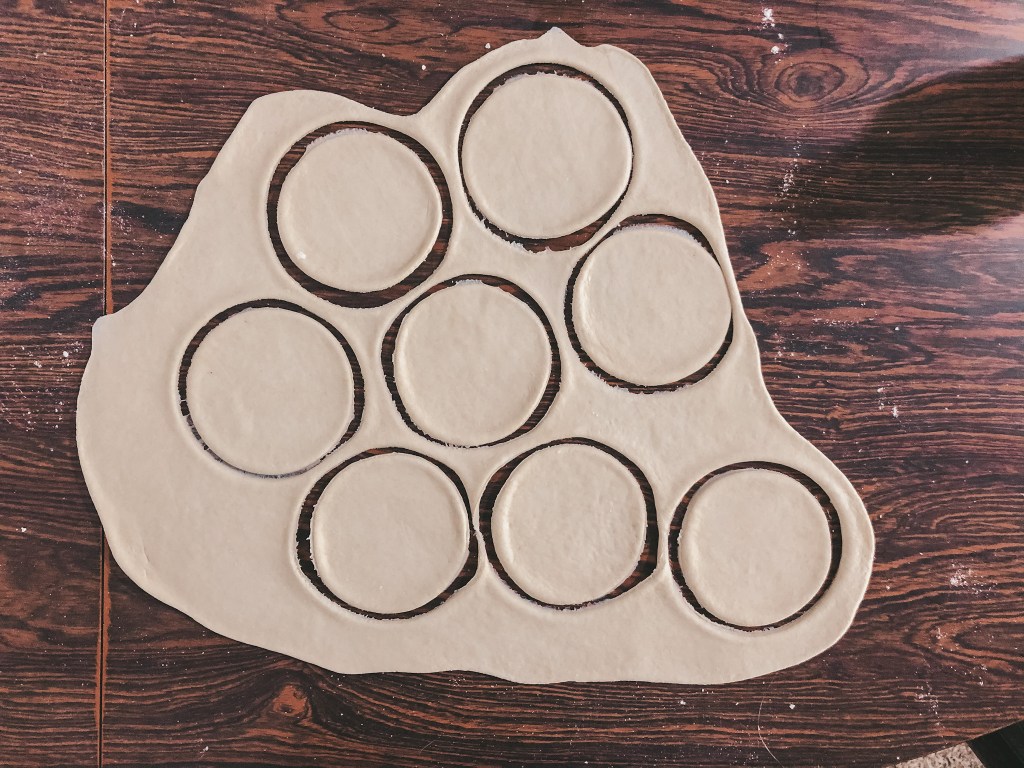
Now spread some flour on your surface and roll out the dough to ~2-3 millimeters thick, and cut out circles using a drinking glass. Mine had an opening that was ~8.5 centimeters in diameter.
Grab your filling and scoop about 1 tbsp of filling (depending on your dough circle size) onto a dough circle. Fold over so it is now a half circle and seal the edge by pinching it. Be careful as to not pinch the filling in the edge or the pierogi will open up while it’s cooking. They’re ready to be cooked!

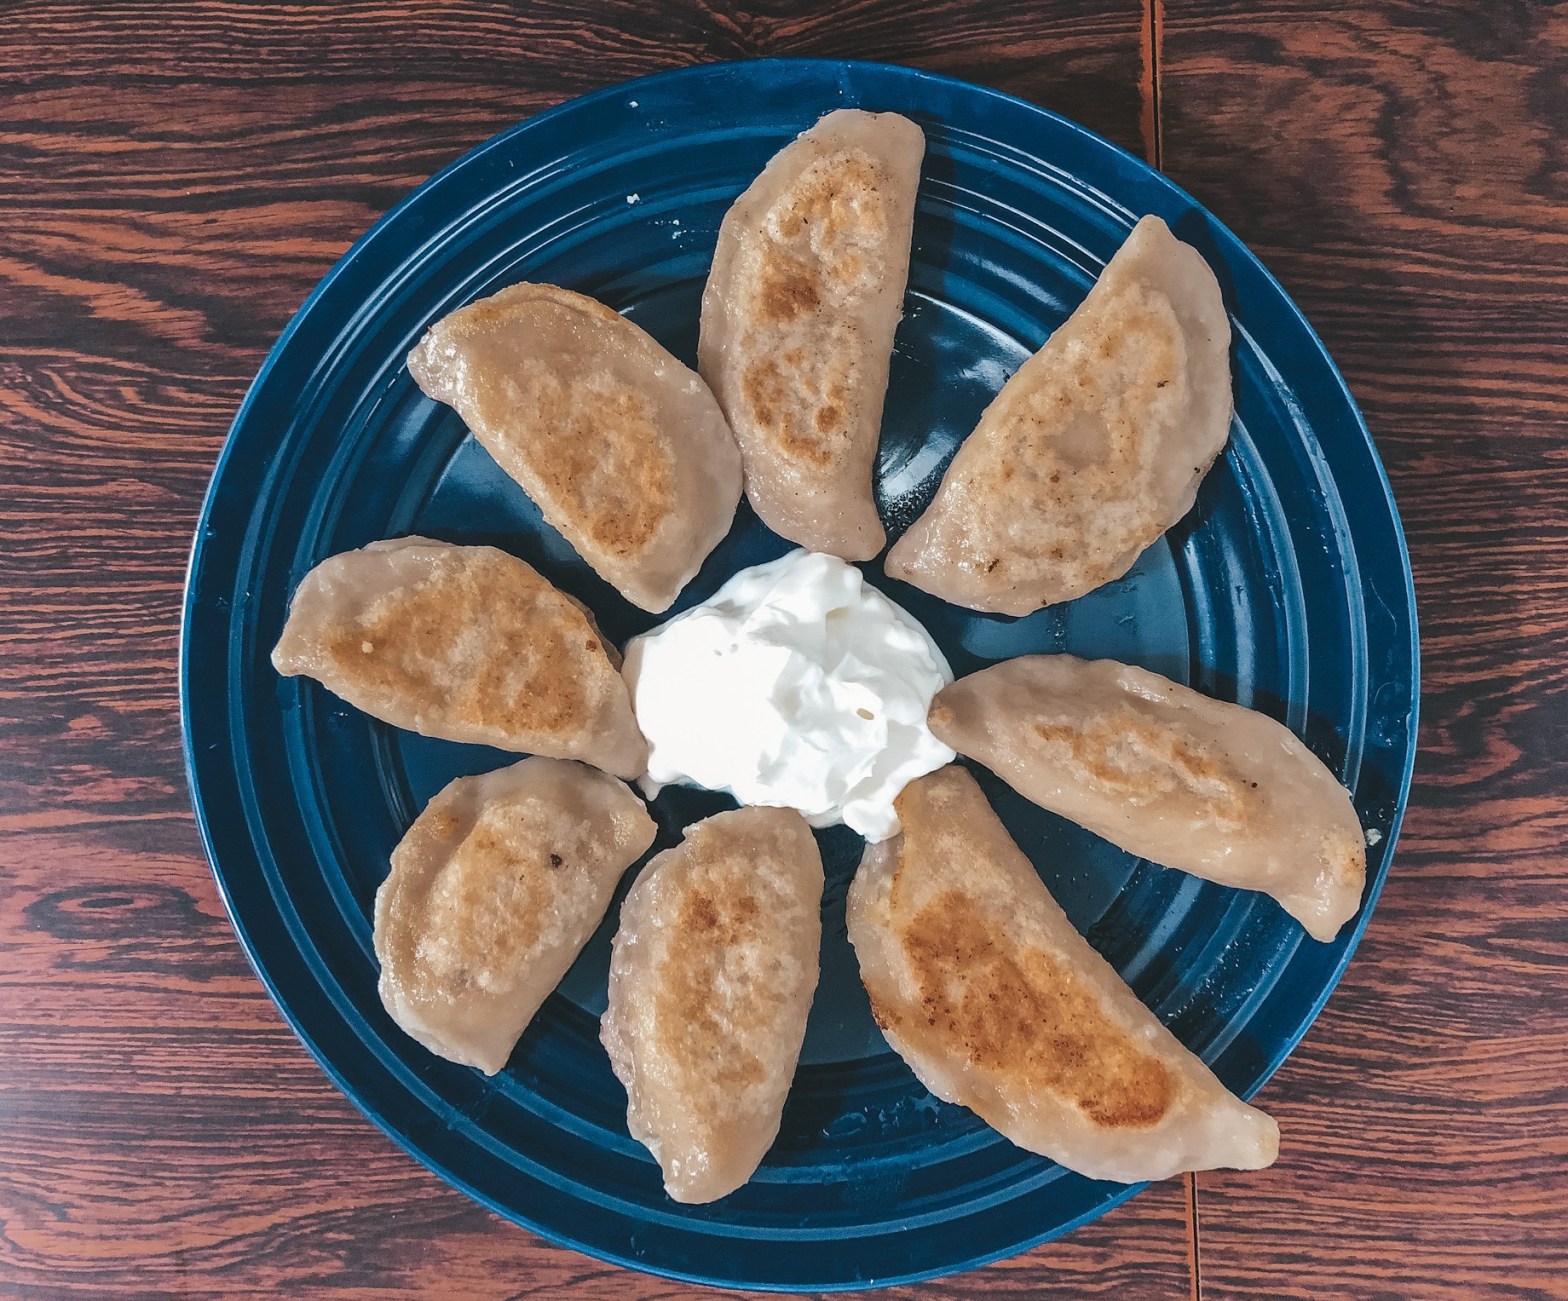
Pierogis are cooked by boiling and then frying. Traditionally, potato pierogis are not fried after boiling, but I fried mine because I like them that way. Make sure you stir the boiling pierogis frequently so that they do not stick to the bottom of the pot! After they begin to float, start a timer for 3 minutes, then remove after time’s up.

After I’ve made the pierogi, I like to eat them with sour cream, which is a traditional topping. Some enjoy them with ketchup, mustard, or other sauces, which are not traditional, but feel free to enjoy them however you see fit!
The Recipes
Traditional Pierogi Dough
Ingredients:
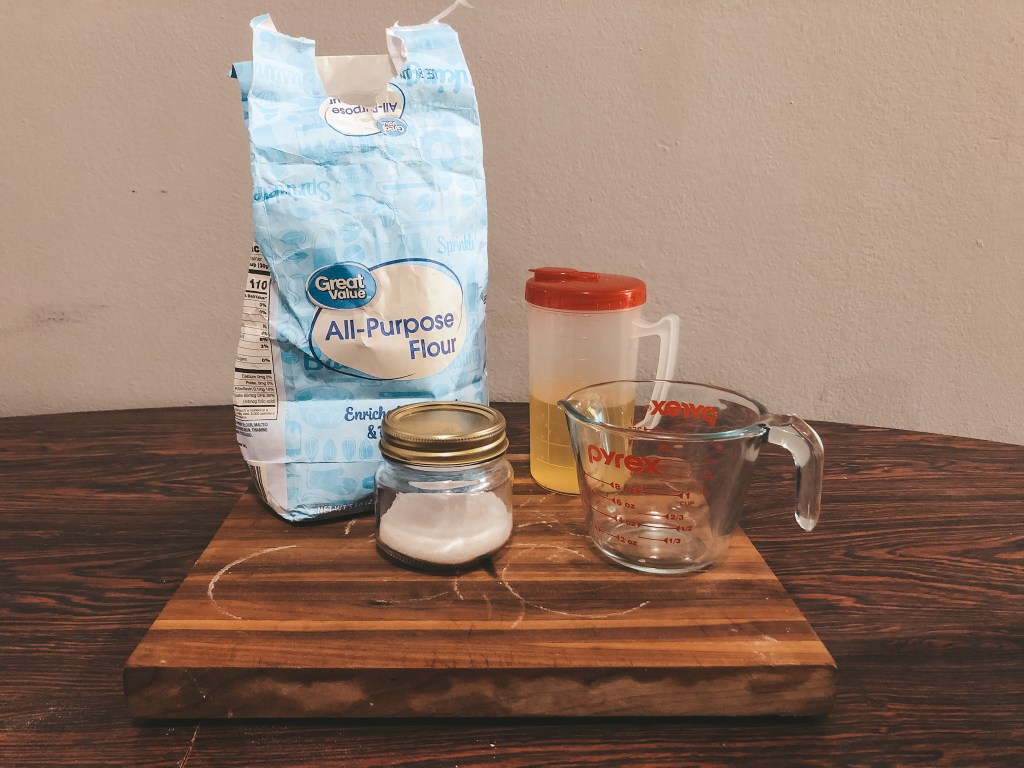
- 3 cups of wheat flour (all-purpose)
- half a teaspoon of salt
- 0.75 cup of boiling water
- 0.25 cup of cold water
- half a teaspoon of oil
Makes ~30 pierogi
Instructions:
- Pour 3 cups of wheat flour into the bowl. Pour the flour through a sieve to separate any lumps and in order to aerate the flour. Thanks to the latter, your pierogi dough will be softer and more delicate in flavor. Then add half a teaspoon of salt.
- Pour 0.75 of cup of boiling water into the bowl, while vigorously stirring the mixture with a fork or wooden spoon. At this stage, it is normal that lumps of flour will form and surface – crumble them down with the fork. Cover the bowl with a cotton cloth and set aside for about 5 minutes.
- After 5 min, add a quarter of a cup of cold water, give it a stir, and crumble down the lumps (if any). Once again cover the pierogi dough with a cotton cloth, but this time set is aside for 15 minutes.
- After 15 min, add half a teaspoon of vegetable oil (canola, sunflower or olive oil). Roll up your sleeves – it’s time for some work. Knead the pierogi dough until it becomes a smooth and uniform mass. In general, it takes 5 to 10 minutes. When finished, the pierogi dough should be homogeneous, stretchy and a bit adhesive. I had to add a little bit more water to my dough as it was pretty stiff.
- Now, the dough is ready to prepare pierogi. Roll out the dough on a pastry board (or simply on a table) until you reach the thickness of about one-tenth of an inch (2-3 millimeters). However, before you start rolling it out, you should flour the pastry board. Thanks to that the pierogi dough won’t adhere or tear. However, remember that one side of the dough should remain clean. You want it to cling on to itself while folding pierogi.
- Cut circles out of the pierogi dough by using a cup. Place the filling in the middle of every circle and fold it to form pierogi.
- Collect scraps of pierogi dough, knead again, roll out and repeat steps 5-7.
Meat and Onion
A few things that I did differently than the recipe I’m about to show you: I doubled the amount of meat and I forgot to put in the two eggs, oops. I only doubled the meat because the store only had 2lb packages and I knew I would waste it if I didn’t use it.
Ingredients:
- 0.5 kg of beef (or about 1 lb) – I used beef brisket
- 0.5 tsp salt
- 4 bay leaves
- 5 grains allspice
- 3 carrots
- 1 parsley stem
- 1 leek
- 1 celery stick
- 1 yellow onion
- butter or oil for frying
- 1 roll (yes, just any sort of bread roll)
- parsley leaves
- two eggs
- salt & pepper
- pierogi dough
Instructions:
- Cut beef into chunks (~2 inch cubes). Boil water and then season water with allspice grains, 0.5 tsp salt, and bay leaves. Put meat into boiling water. You can probably reduce the heat a bit so the water stays hot but not boiling (Medium-high)
- Prepare wloszczyzna vegetables: peel and cut into small stripes (I just cut them into discs and then cut the discs in half) three carrots, one parsley ( I just put one whole parsley stem in the pot), one leek and a celery stick. Put vegetables into stock with meat and leave gently cooking on half an hour ( I just left them cooking until the meat was cooked through). I used fresh vegetables, but the original recipe preferred frozen.
- While the meat is being cooked with vegetables, peel and dice yellow onion.
- Fry onion on the frying pan with the addition of butter, until it lightly browns itself. I used 4 tbsp of unsalted butter.
- Take the meat out of stock and tear into smaller pieces. I also removed the veggies and put them in the bowl with the meat.
- Drop the roll into the pot of stock and leave it until it’s completely saturated. Then take it out of the bowl, squeeze it out, and add to bowl of meat & veggies.
- Add the fried onion to the meat bowl and stir everything together.
- Grind the blend of onion, meat, veggies and roll in a meat mincer (I used a blender, you can also use a food processor.)
- Chop parsley leaves up and add to stuffing after blending.
- Break two raw eggs into a meat mixture.
- Add salt and grinded black pepper. Mix. Season to taste.
- If your stuffing is too dry add some stock (the liquid the beef was boiled in). You don’t want your mixture to be too wet, though, or it will be hard to close the pierogis.
- Now arrange this stuffing with teaspoon on pierogi dough circles and carefully squeeze them shut.
- Boil pierogi in salted water. After they float to the surface, start a timer for 3 minutes (or cook until they become soft), then scoop them out.
- Pan-fry the cooked pierogi. Use butter or sunflower oil. Fry pierogi on both sides – turning periodically. Fry pierogi, until they become firmly browned on both sides.
Potato and Ricotta
Ingredients:
- 3-4 russet potatoes
- 1 cup (8 oz) farmers cheese (or ricotta cheese)
- 0.5 tsp salt
- 0.25 tsp pepper
- 1.5 cups yellow onion (I just used 1 whole onion)
- 4 tbsp butter (for frying onion)
Instructions:
- Boil russet potatoes for ~30 minutes or until soft
- While potatoes are boiling, dice onion
- Remove potatoes from water and allow to cool enough so that you can handle them. Remove skin and eyes from the potatoes. You can then either shred or mash the potatoes.
- Add the salt, pepper, and ricotta (or farmer’s) cheese to the mashed potatoes and stir together.
- Fry the onions in butter until golden and then add them to the potato mixture.
- At this point, the mixture is placed in the fridge to cool so that it can cool (it’s easier to handle this way).
- Make your dough
- Place 0.5-1 tbsp of mixture onto each pierogi dough circle and seal.
- Cook pierogi in salted water. After they float to the surface, start a timer for 3 minutes (or cook until become soft), then scoop them out.
- Pan-fry the cooked pierogi in butter or oil. Fry pierogi on both sides – from time to time turning from side to side. Fry pierogi, until become firmly browned from both sides.
How to store Pierogi?
My favorite storage method is to freeze them! They last longer and they’re easy to just pop into some boiling water to heat them up and then fry. To prepare the pierogi for freezing, you will need to blanche them.
Freezing your pierogi:
- Drop the raw pierogi into boiling water. Allow to cook until they float.
- Once the pierogi are floating, scoop them out and immediately cool them in a bowl of ice water (this is blanching).
- Dry the pieorgi off a bit and then place them onto a sheet pan and into the freezer.
- After they are completely frozen, move them to a bag for more convenient storage.
- Violà, you’re done!
